I had spent some time flying my first Bixler 1.1 around using FPV and was getting quite used to it. I was also occasionally crashing it and it occurred to me it would be nice to have some spare parts. Checking online I found that Hobbyking’s USA warehouse was selling the airframe kit (no motor or electronics) for the crazy-cheap price of only $42! So I had to have a spare.
I had been crashing my original Bixler often enough to have concerns about what might happen if I finished building out my Techpod. If I ran that sucker into the ground, when fully equipped, we’re talking serious money. So I got to thinking about setting up my “spare” Bixler 1.1 as sort of a mini camera ship and an interim development step. If that worked out OK, then I would be comfortable completing the Techpod. Wow, that seemed like a good idea, not the sort I usually get. Or maybe it was just an excuse to build something new.
As is often the case with me, I start on these projects and things get out of hand. I’m always looking to make things just a bit better.
The first black hole of work effort was the electronics pod. I had found descriptions of similar things online which are removable pods containing the flight controller, camera, battery and all the other electronics needed to keep it flying. Considering what a mess the inside of my original Bixler had become, it seemed a good idea.
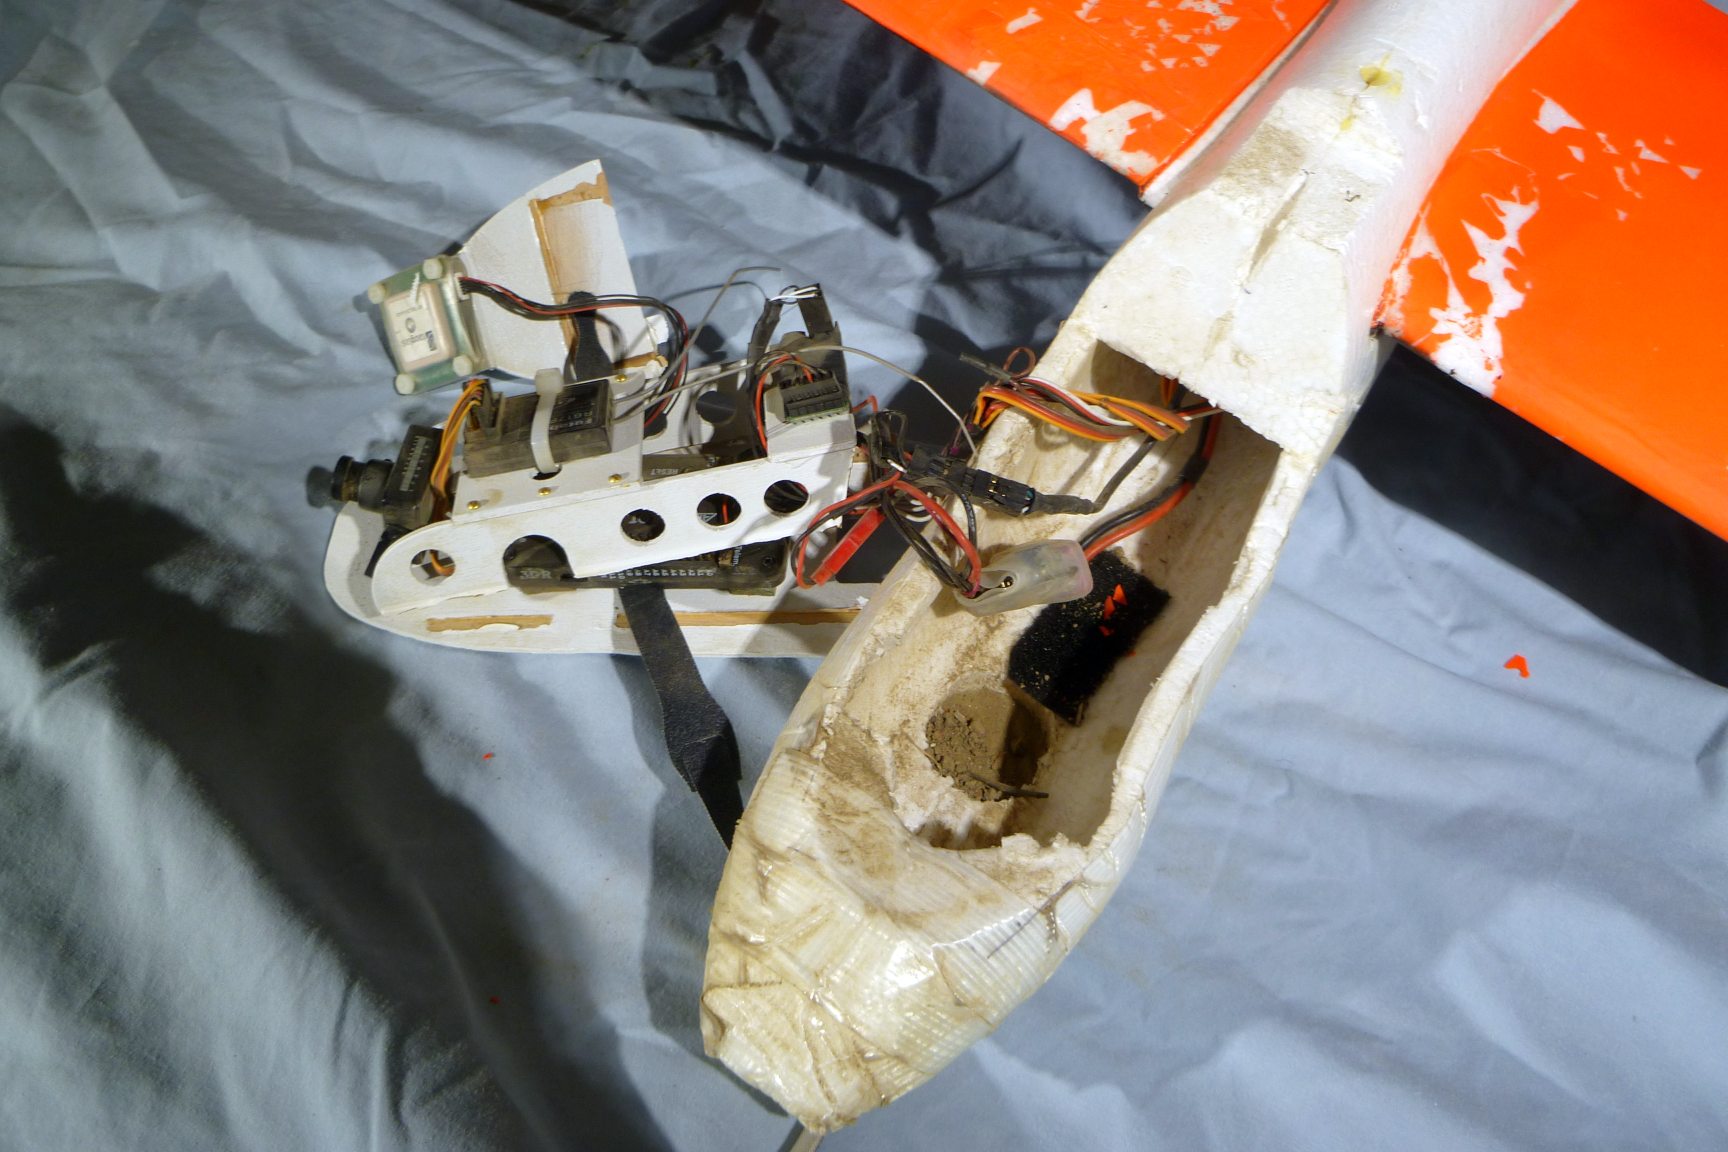
And it was actually a great idea. At the very top of the pod I concocted is the GPS. On the main platform are the Futaba RC receiver, APM flight controller and FPV camera. Beneath those are some more electronics and a holder for my Canon A2200, 14 megapixel camera which peers down through a circular hole in the fuselage bottom. I rigged up an Arduino set to run as an intervalometer for the Canon, taking pictures at intervals and would retract the camera lens prior to landing. I made up some multiple pin quick connects allowing for the electronics pod to be quickly disconnected from the rest of the aircraft, including the servos. Just constructing the electronic pod was a geek orgasm, but I wasn’t yet done. I was just warming up.
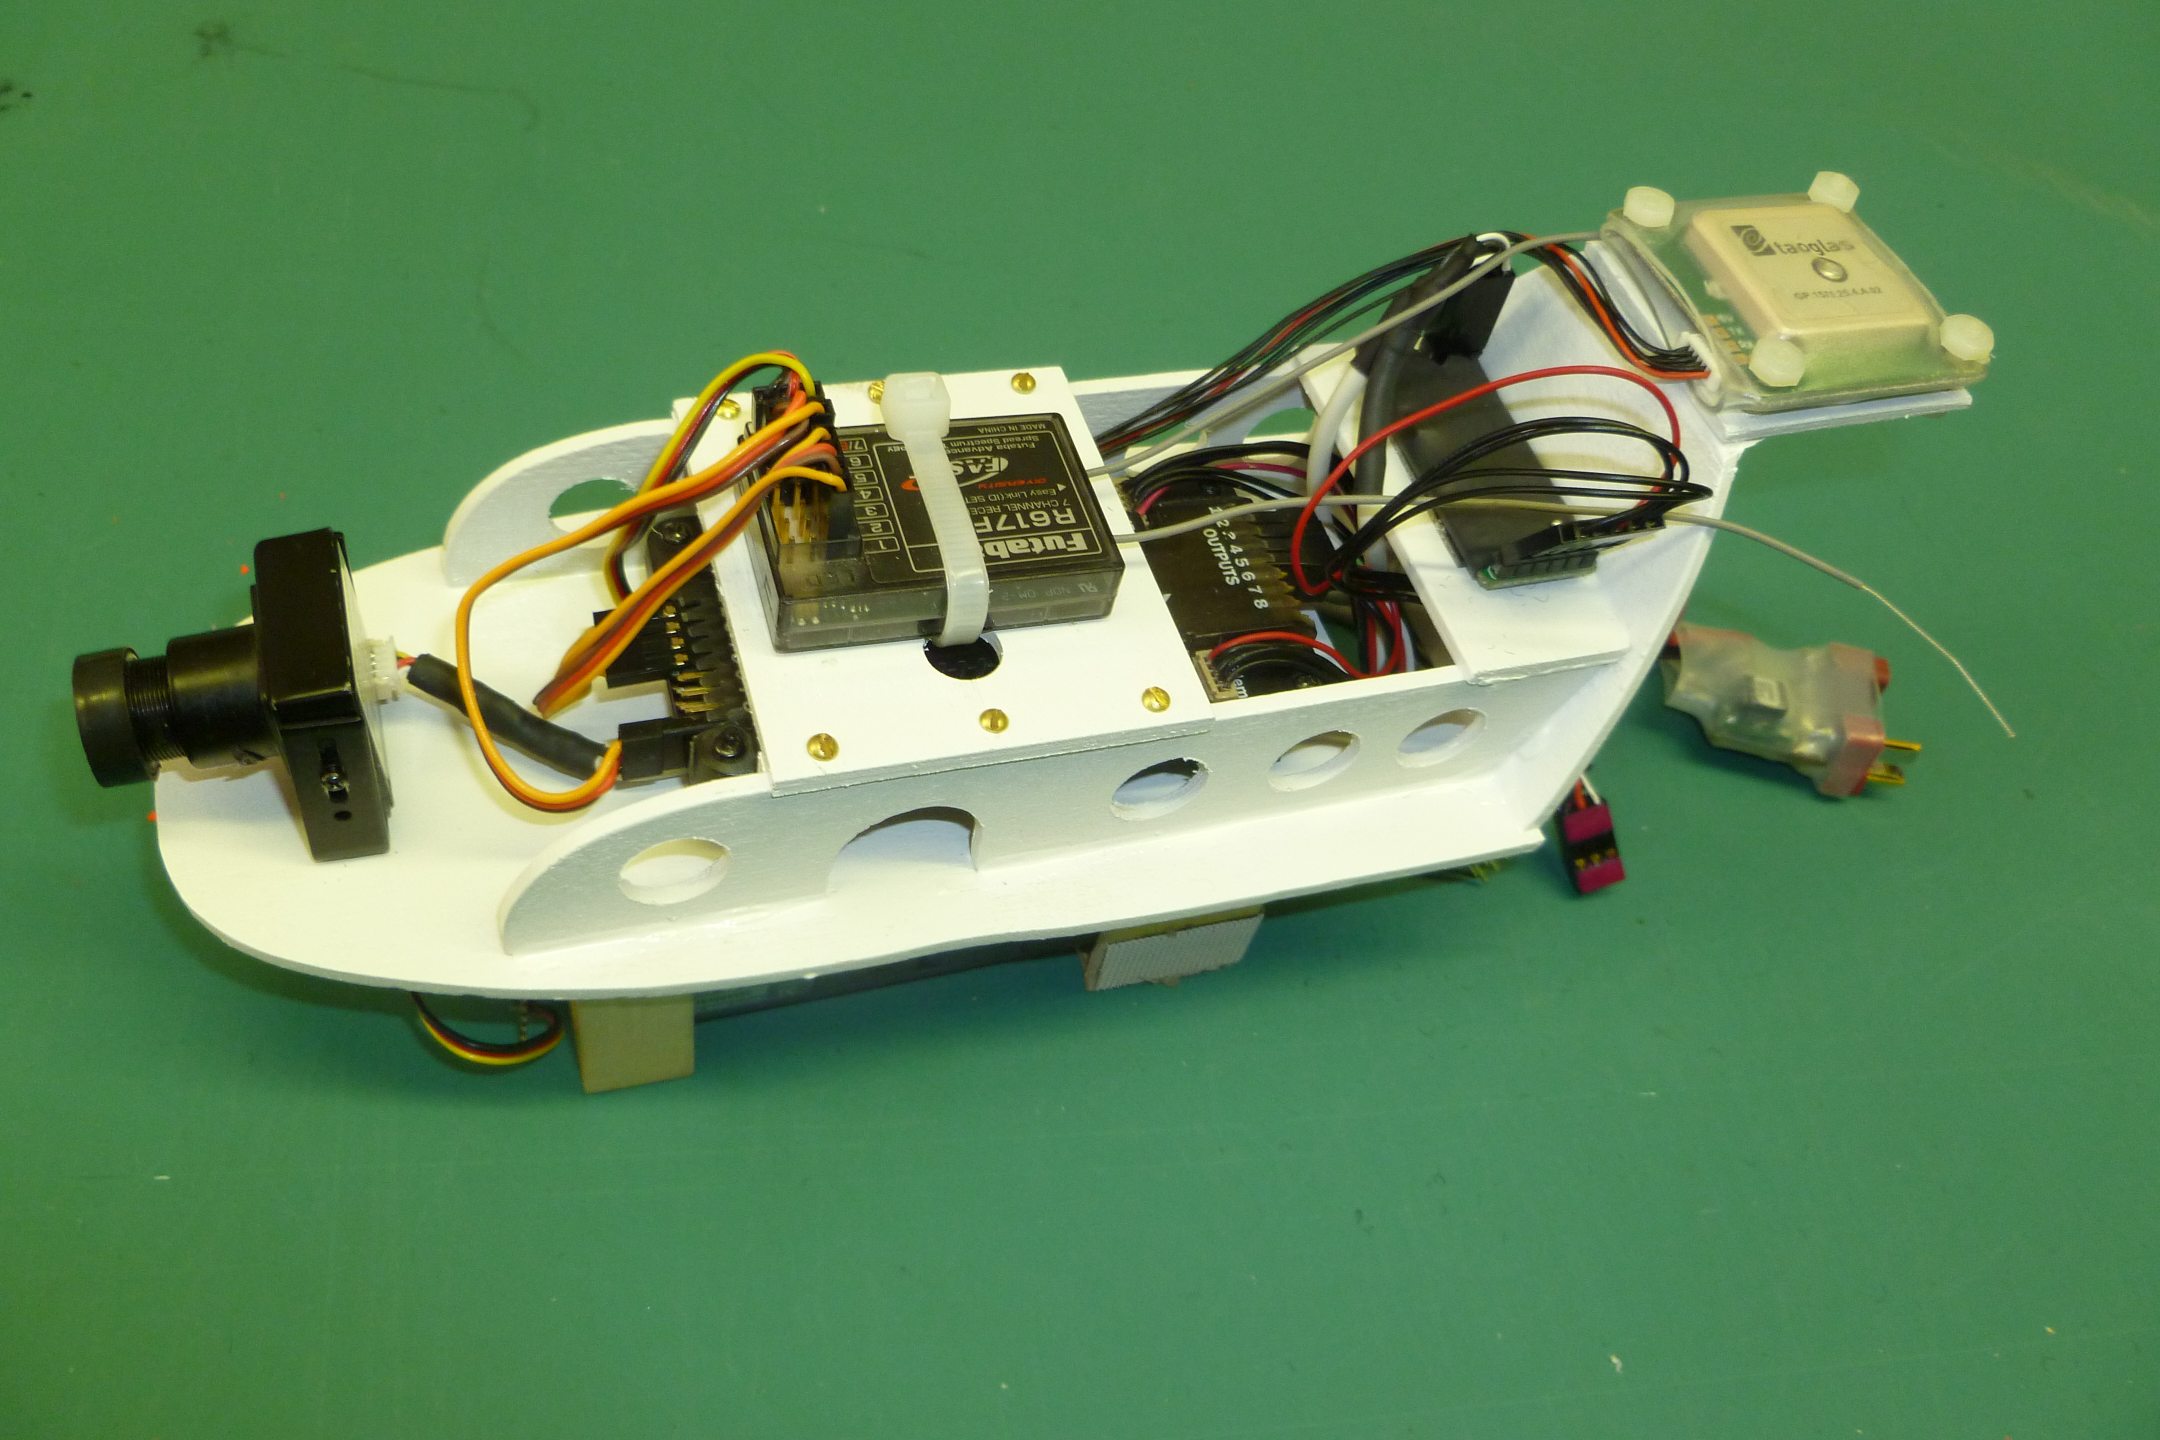
A top view of the electronics pod showing all the upstairs stuff. FPV camera on the far left, RC receiver in the middle with the APM flight controller below it, GPS to the upper right and the onscreen display board just to the left of the GPS. Wunnerfully laid out and it will never look this nice again.

A view of the electronics pod showing the still camera placement as well as the connectors that joins it to the rest of the aircraft.
Somewhere online I came across a reference to someone equipping their Bixler with a removable tail section (the Internet is a terrible thing…). I thought, “Yeah, that sounds neat, but I bet I can do it even better!”. And I did. I relocated the elevator and rudder servos far to the back in an effort to counteract all the extra weight I figured I’d be adding to the nose. Then, multiple visits to a serious hardware store provided me with quarter inch threaded nylon fittings I could use to make the entire tail section removable. I think I had in my mind some idea of putting it in a backpack, which would have been quite cool. I am my own worst enemy sometimes.
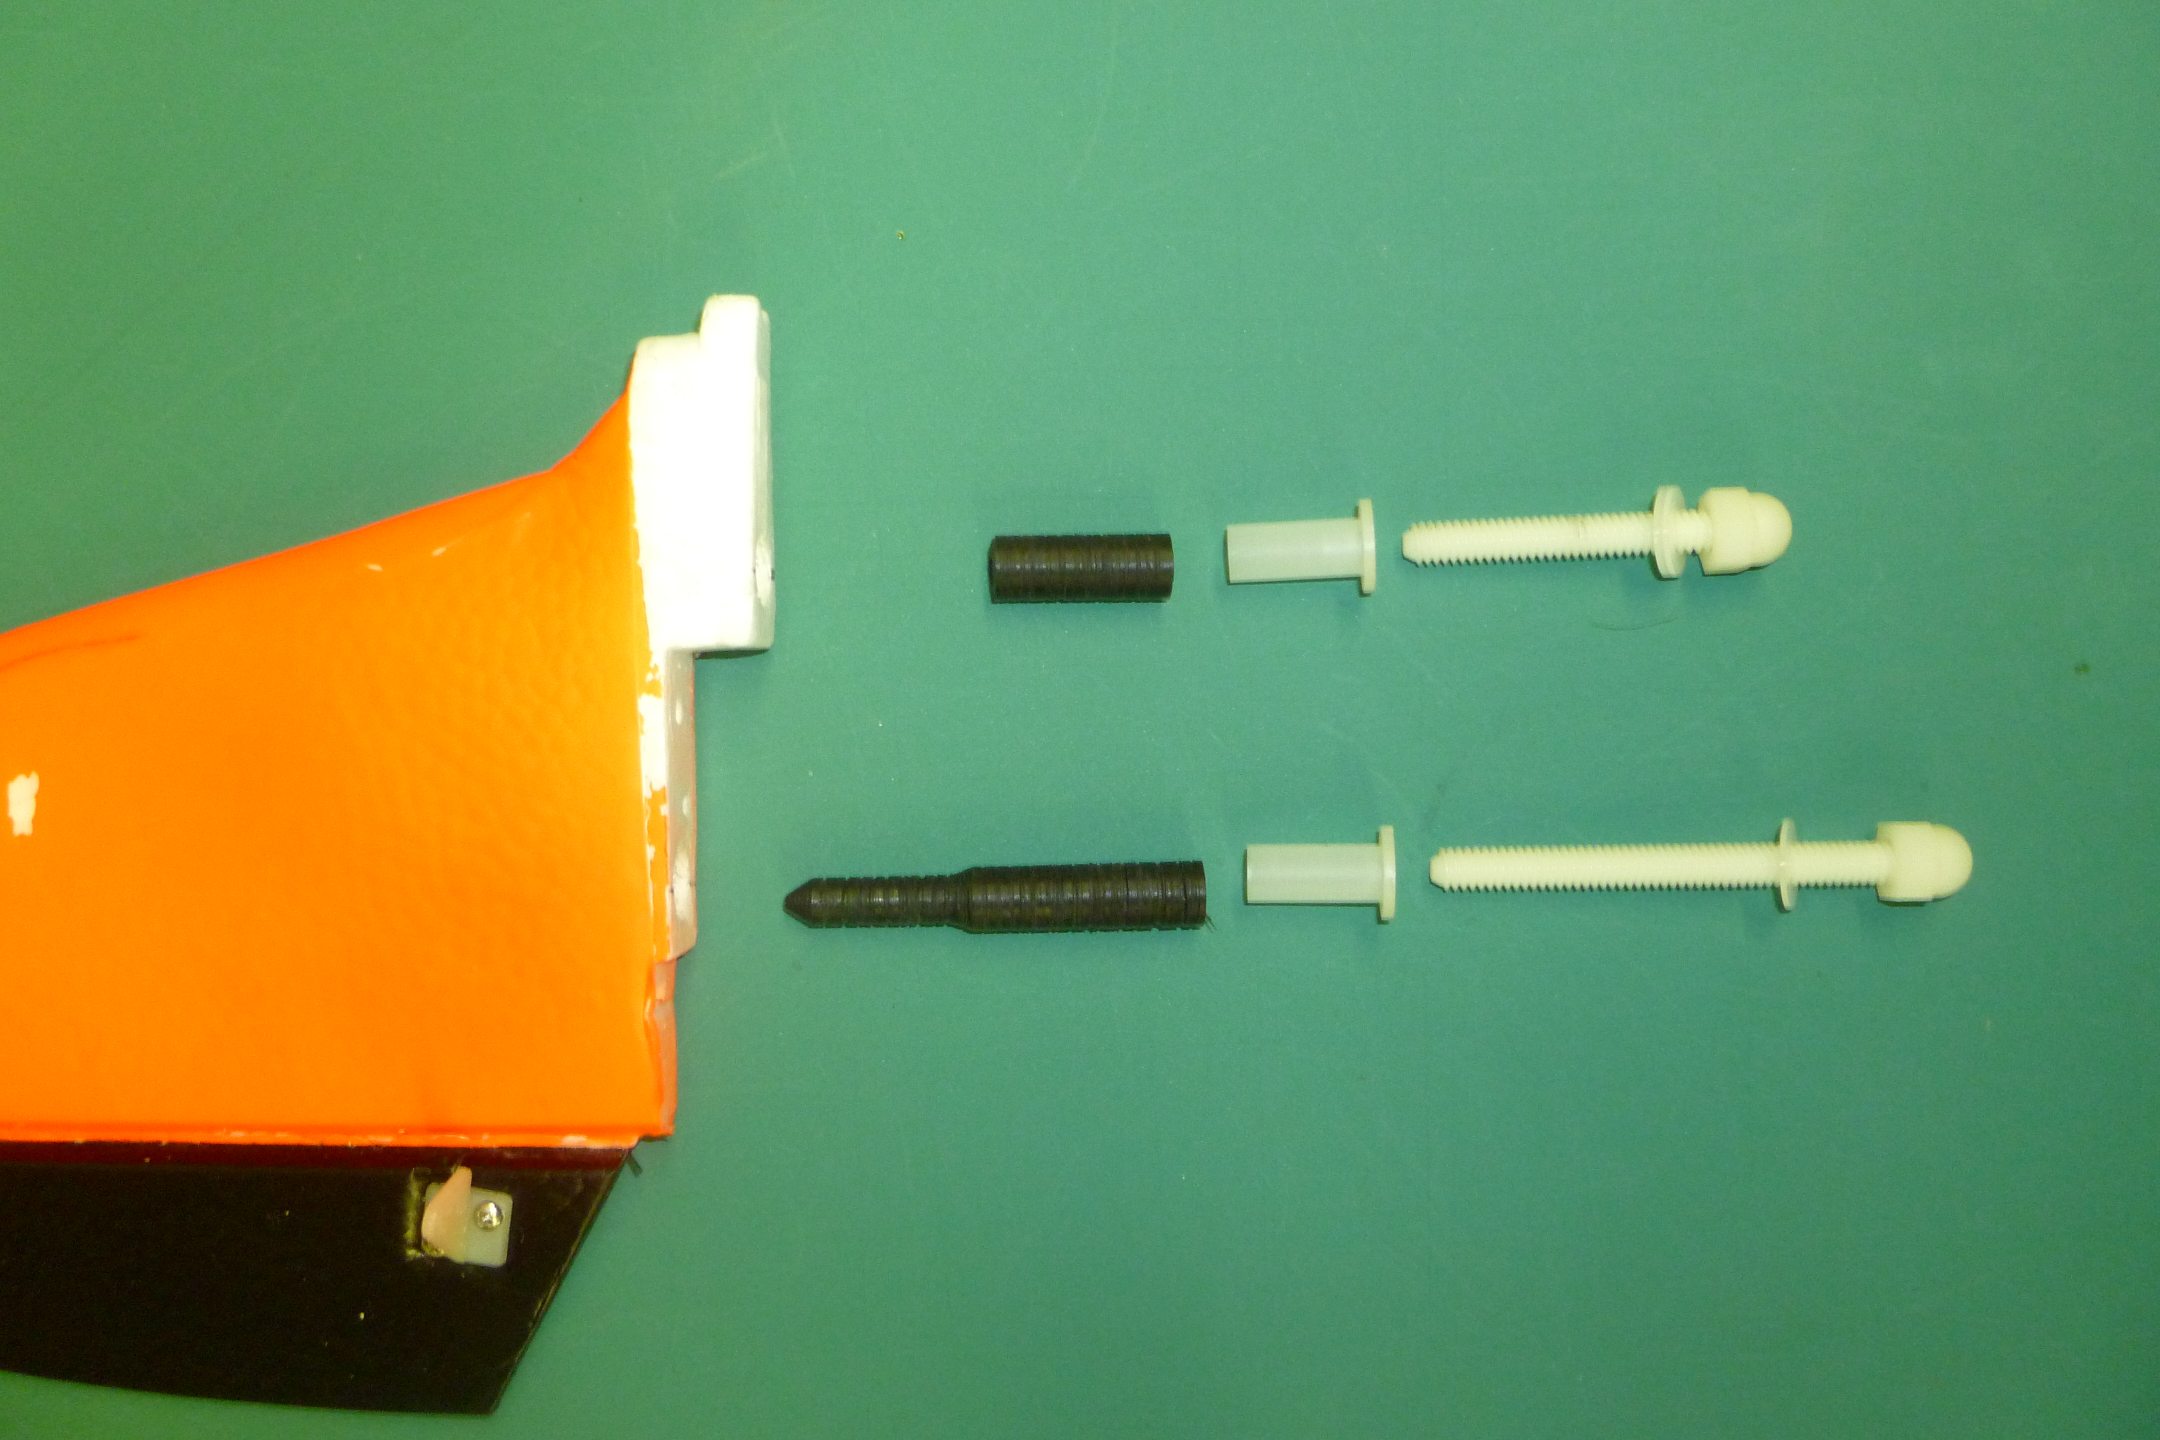
Tail/elevator attachment arrangement. The black doodads are machined Delrin rods that have been threaded to accept the 1/4″ Nylon bolts shown. The white things in between provide a seat for tightening the bolts.
The threaded Delrin rods glued into the tail.

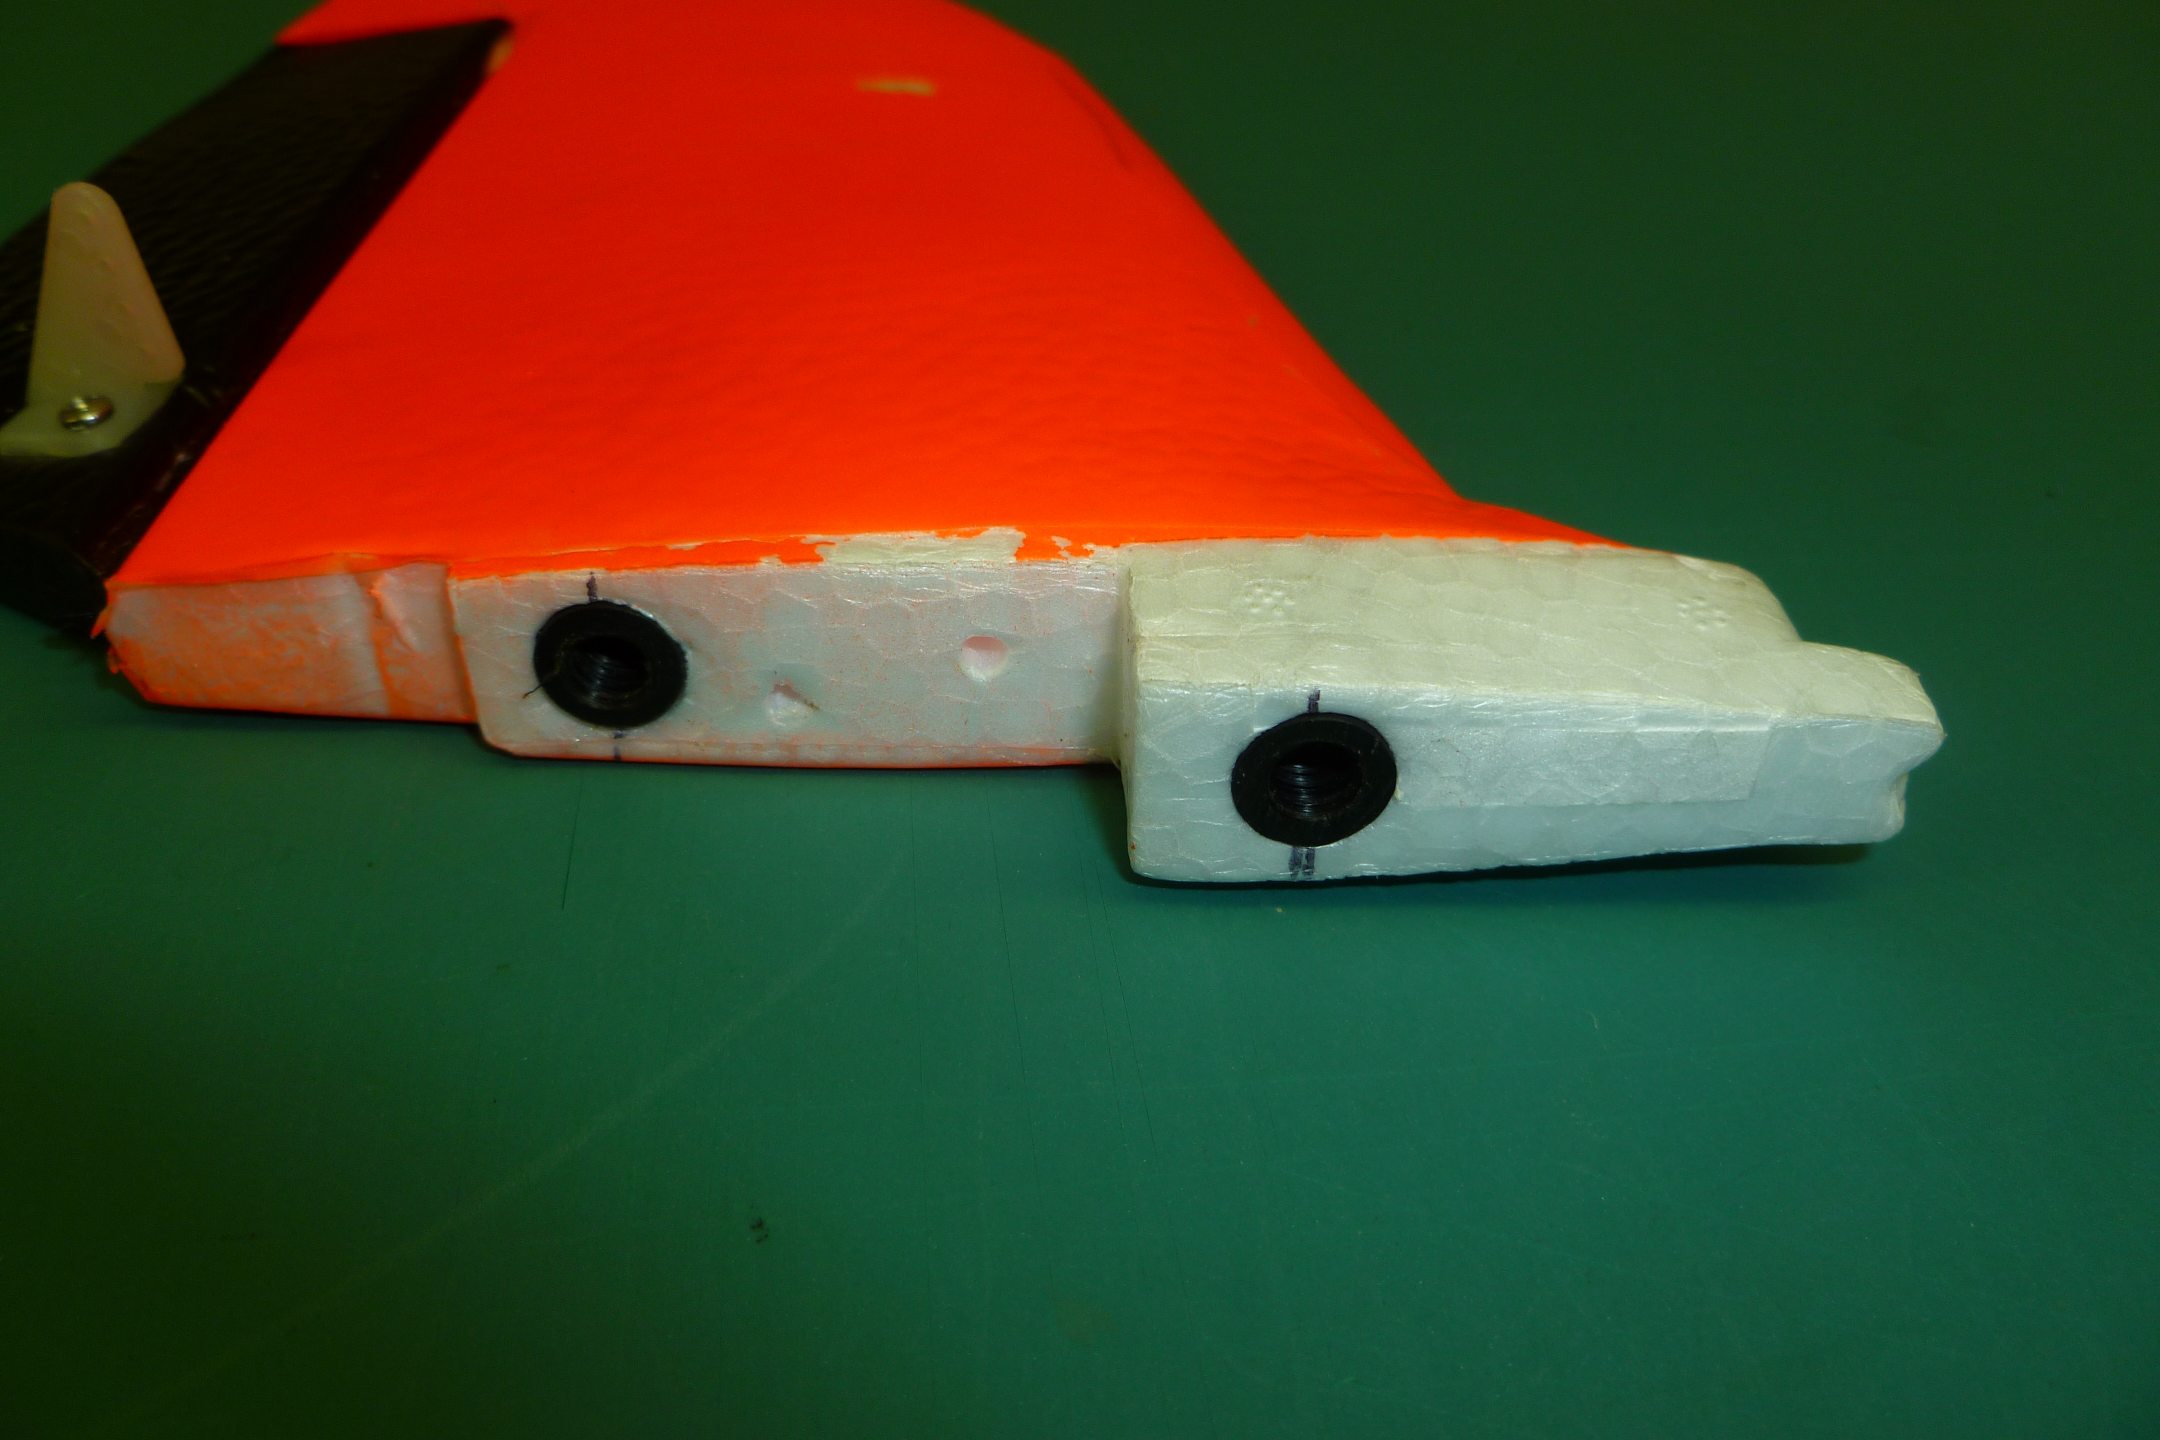
The end of the fuselage showing the white Nylon bolt seats glued in place. These spread the load from the Nylon bolts and keep them from crushing the end of the fuselage when tightened.

Looking down through the bolt holes where the tail section will go. The tops of the white Nylon bolt seats are barely visible inside the holes.

The assembled tail section showing the Nylon bolts in place. I used cap nuts to be able to simply tighten these by hand. I probably could have got by with only one connection bolt but I always expect the worst, so I used two. The servo link to the elevator hasn’t been connected yet.
I placed the video transmitter in the tail boom, as had worked well in previous fixed wings, and added a seriously upgraded motor and speed controller. At this juncture the point of no return was reached as it was time to glue the two fuselage halves together. So far, so good and no going back.

The fuselage before gluing together, showing the major components and wiring layout. That’s the video transmitter and antenna at the right side. This is insanely well organized at this point, but it won’t last.
I modified the wings in a couple of ways. I added three pin connectors for the aileron servo wiring at the wing roots so when I connected the wings to the fuselage I could just plug in the servos. And rather than use the Bixler scheme for attaching the wings to the fuselage (I had already damaged my original Bixler in crashes as a result of using it) I used a popular method of utilizing Velcro tape. Combined, this made for easy wing installation and a safe release in case of impact. Not that that would ever occur.
But wait, there’s more! To strengthen the wings I went to the trouble of laminating them. This was a method, developed in recent years by modelers, to improve the rigidity of foam wings by laminating a thin film of a mylar-like material on to their surface. Usually this material is the same stuff used for laminating paper and is sold by the roll. There is a heat activated adhesive on one side and the film is simply “ironed on”. Well, maybe not “simply”, as there are all sorts of pitfalls to avoid (and I found them all). But in the end it provides a lot of extra strength.
Oh, but wait again! There’s even more! Since this aircraft was intended to fly some distance out, visibility became an issue. Even if flying autonomously or via FPV, I still wanted to be able to see it as far away as possible. A plain old white aircraft wouldn’t cut it. After a lot of study online, I managed to come up with a truly garish paint scheme that was not only highly visible, it was painful to even look at.
Basically, when looking down on an aircraft, fluorescent colors are good against the ground (or hunting for downed aircraft, again, not that that would ever occur). When looking up against the sky, dark colors are best. This resulted in a International Orange/Black mixture that was certifiably appalling. But it was visible, and that satisfied my inner engineer.
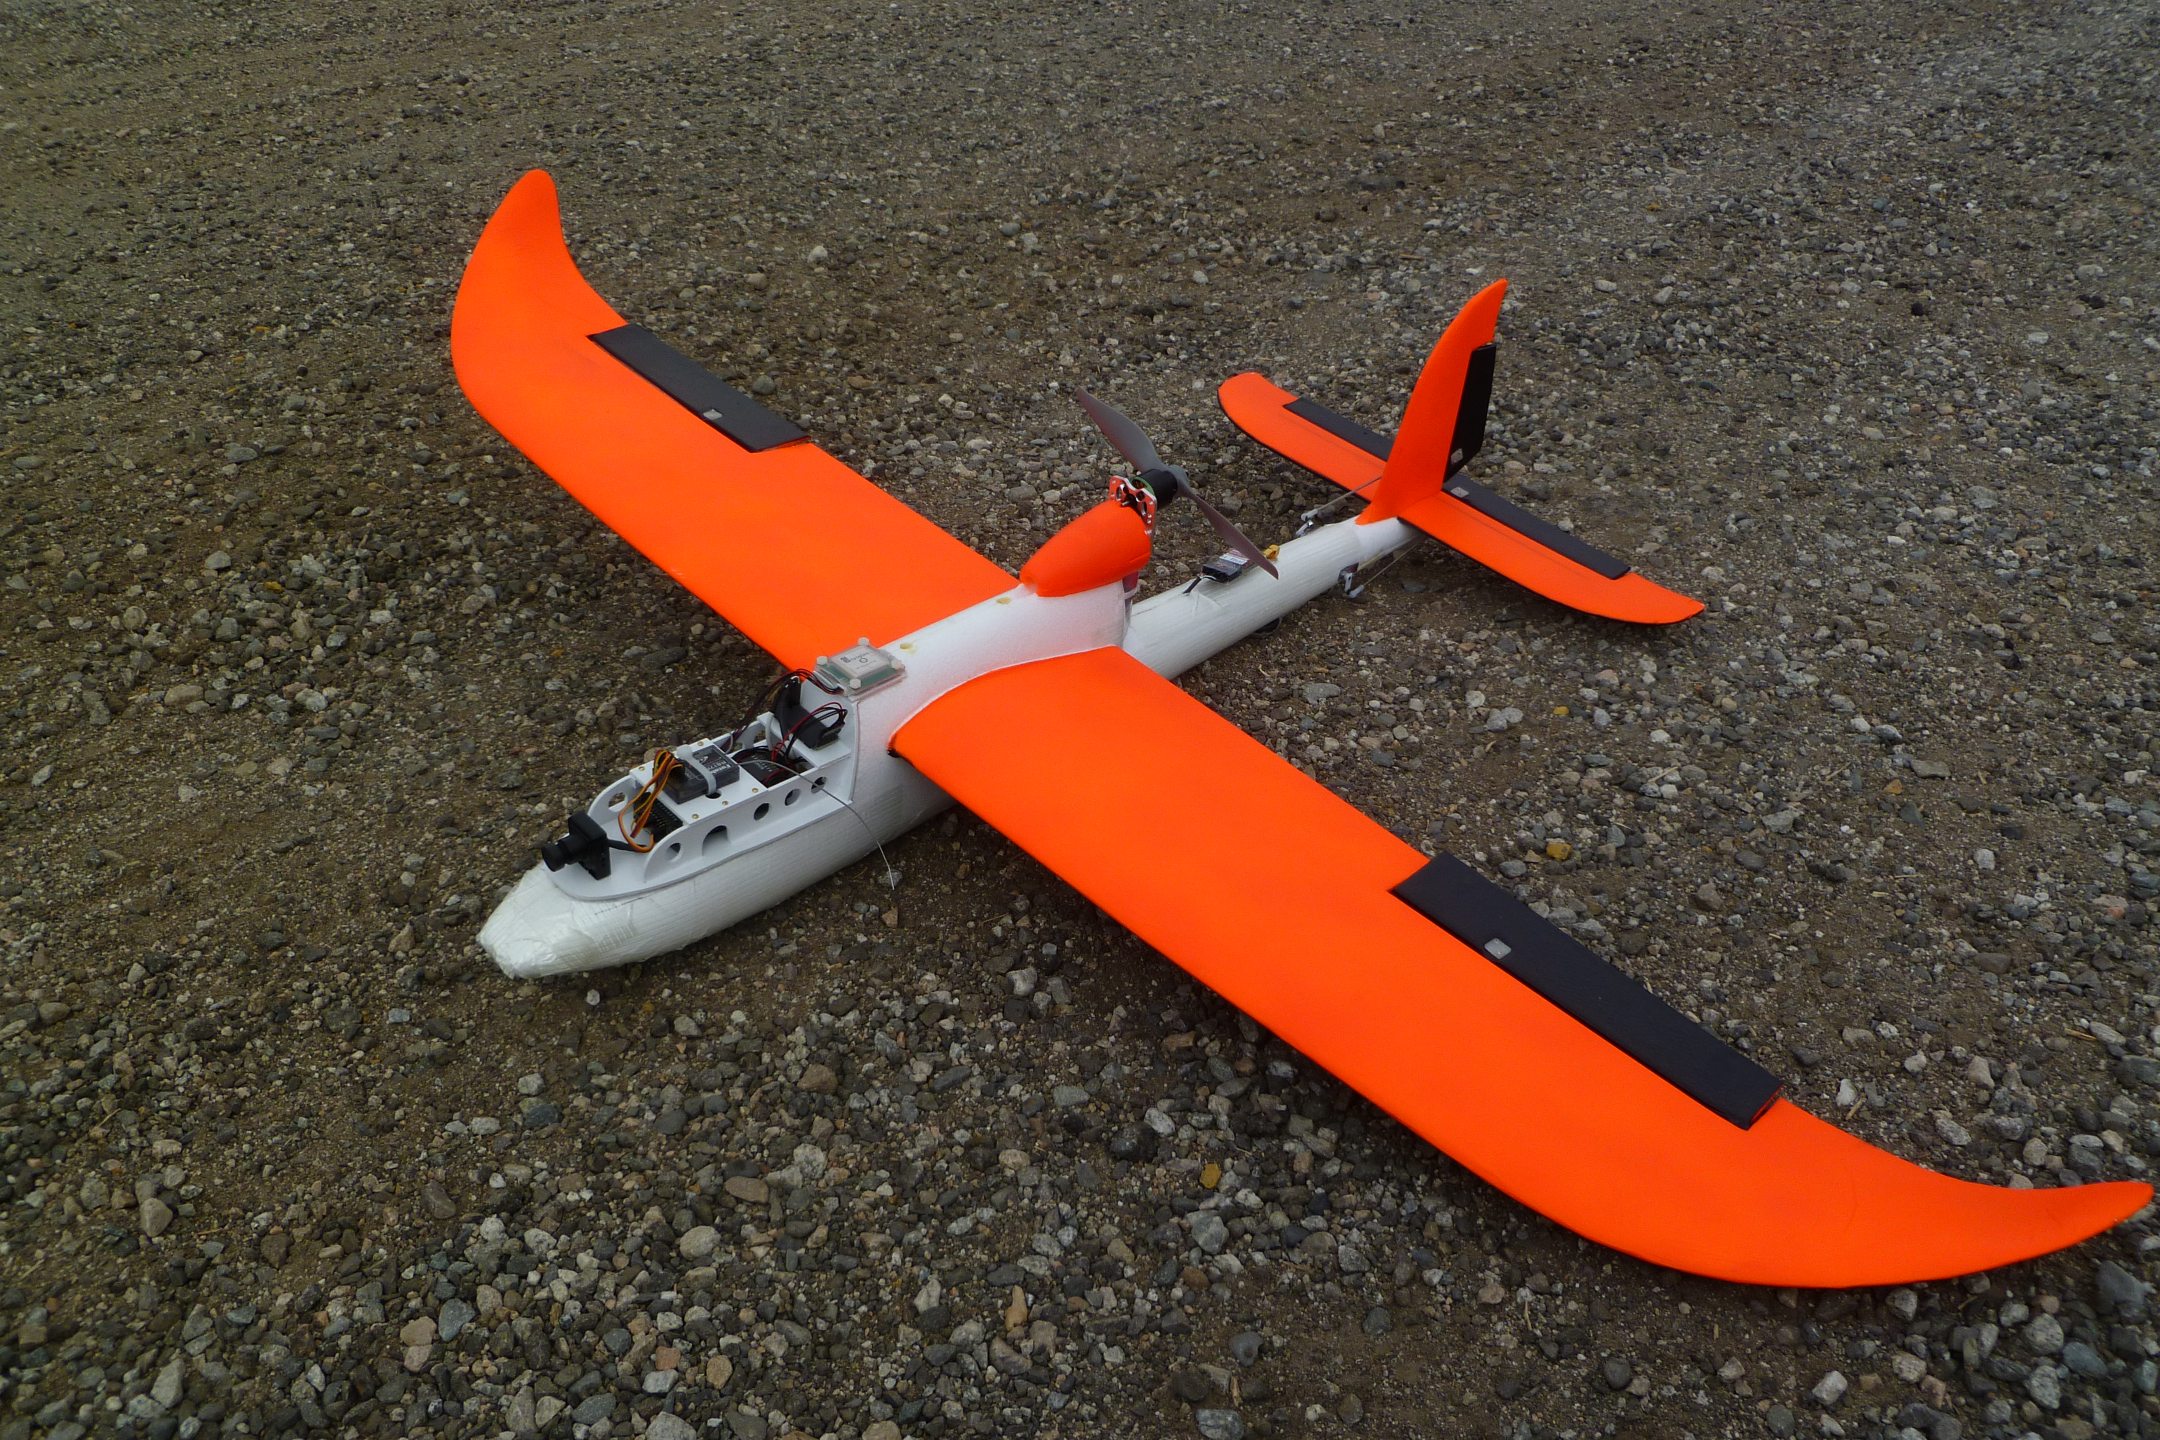
A beauty shot before I wreak any havoc upon it. I mean “beauty” in the sense that you overlook the “OMG, MY EYES ARE BLEEDING!!!” paint job. But you ain’t gonna lose this sucker.
So if you’re still reading this drivel at this point you may have noticed how long the aircraft’s description has become. That’s quite a lot of words. Now translate that word crap-pile into construction time and we’re talking months. It was well thought out and carefully constructed. I had invested a LOT of time into it. And this now emerged as a big problem.
I was afraid to fly the damn thing.
If it were just something I had bought and could easily replace it would be no big deal if I crashed. But this was all custom made and fit, one of a kind. It was my baby, part of me. And I fly like an idiot. I thus realized I had made a serious strategic error.
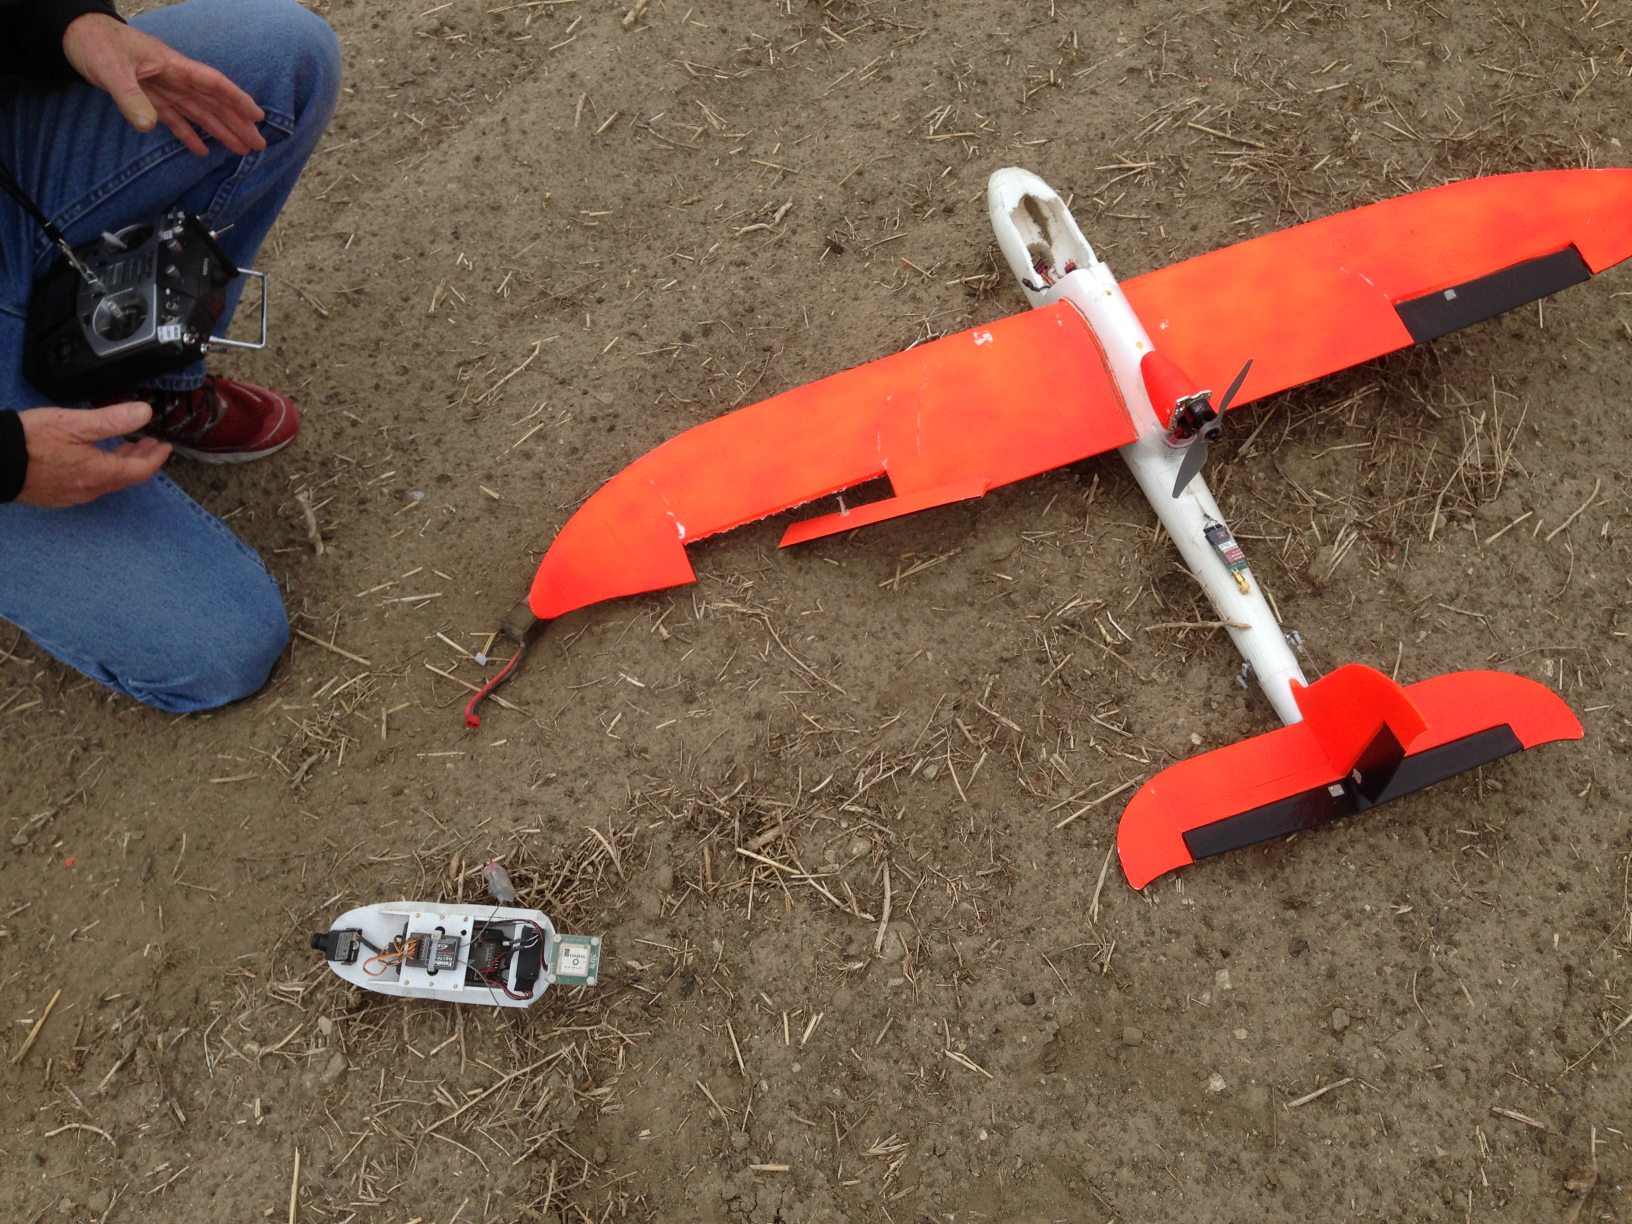
I put off flying it for a number of weeks then finally headed out to Moreno Valley with Patrick to give it a test. Not much to hit there. Except the ground. I fired up the motor and Patrick tossed it into the air. And all went well for about 10 seconds.
As God is my witness I thought turkeys Bixler’s could fly! I have no idea exactly why it crashed, other than I was overcontrolling like mad. The APM wasn’t doing anything as I was flying in Manual mode for the launch. It probably made it about 200′ away before impacting the ground hard enough to end flight for the day. The electronics pod had broke loose and possibly ripped off one of the ailerons. The wings had flexed so much on impact that some of the obnoxious orange paint had flaked off. It was a minor mess.
Oh the humanity!!! Doesn’t look quite as pretty at this point, after its first crash. But it’s going to get worse.
The carnage really wasn’t too bad but I parked it in the garage and sulked over it for a few weeks. Eventually I felt guilty and started repairing the damage. I stripped out all the excess gear, like the camera mount, and was going to see if it would fly with just the APM and FPV gear. Baby steps, apparently, were what I needed. Time to try again.
Back out to Moreno Valley for round two. Seeing as how I had already munched it up pretty bad, I was less nervous about doing it again. Failure wasn’t an option, it was a high probability!
Patrick, tosser that he is, again did the launch honors. I managed another 10 seconds or so before the traditional impact into our planet. Surprisingly there wasn’t much damage and we were able to relaunch from that spot. In hindsight I probably should have quit while ahead.
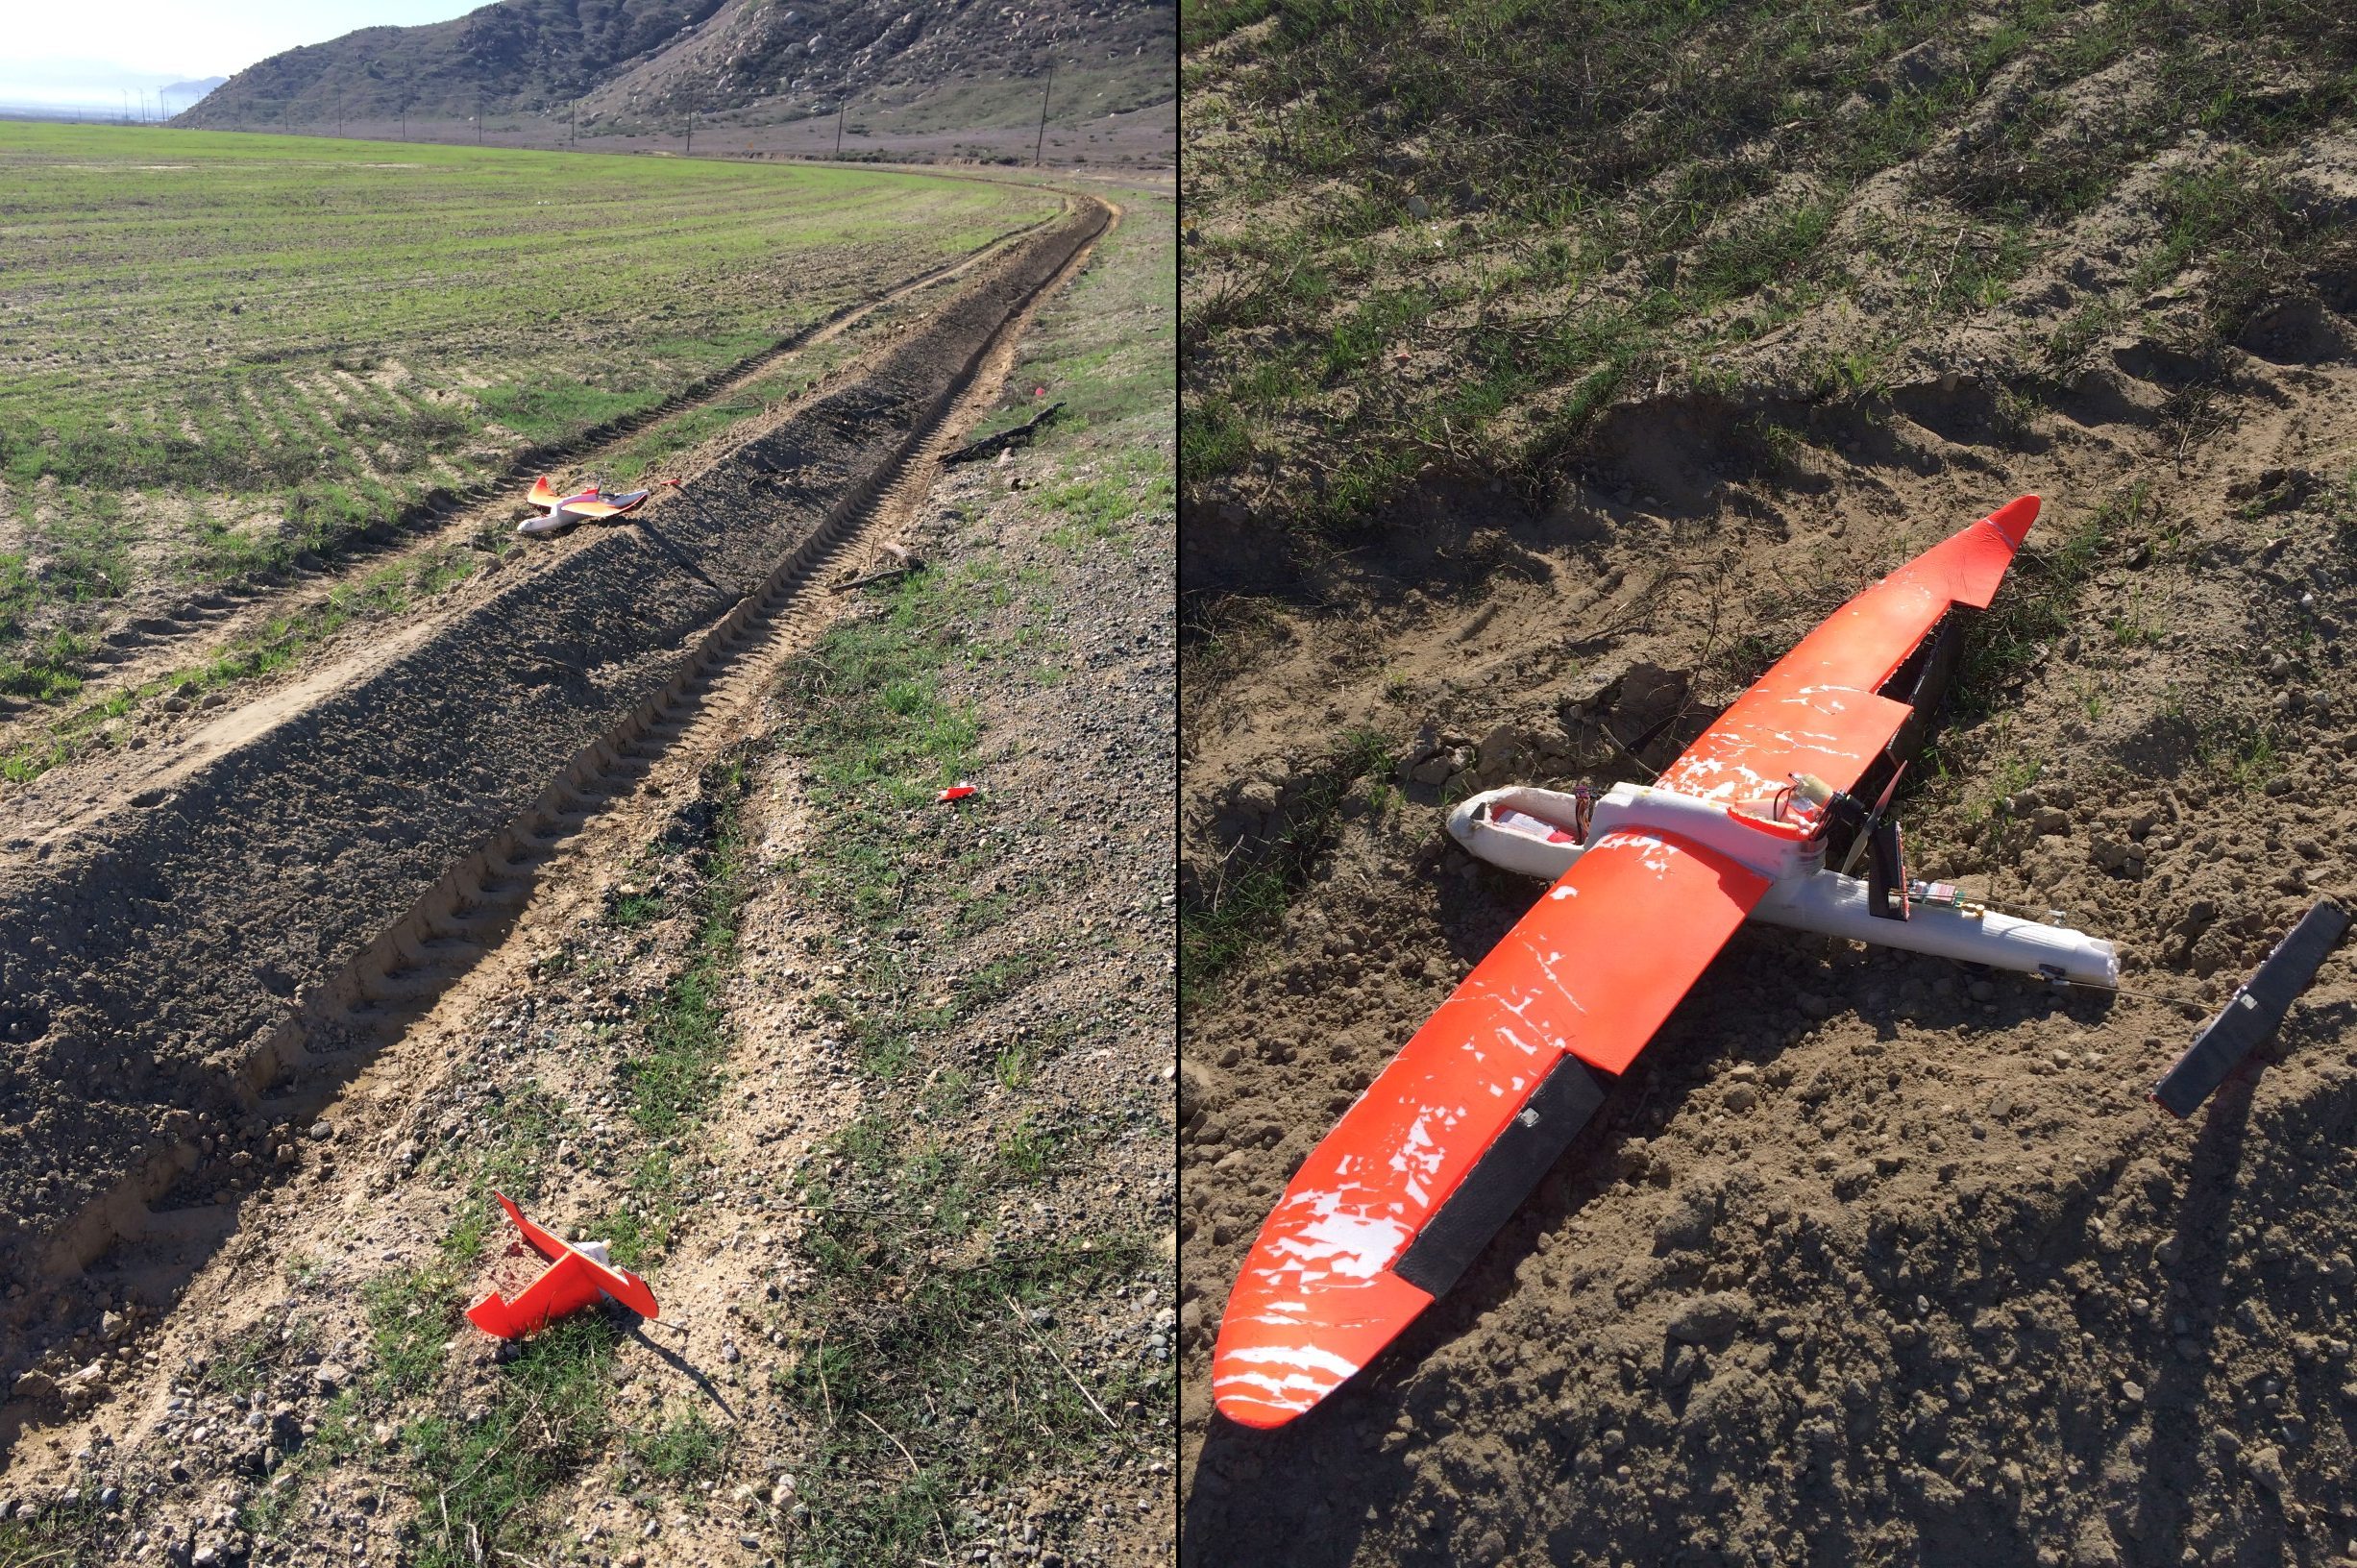
I made maybe 15 to 20 seconds on that second attempt at what could loosely be called “flight”. This was both good and bad. Good in that it was my longest flight of that aircraft to date. Bad in that it let me build up considerable speed before reaching the inevitable conclusion. And it hit hard. How hard? Well, it left a friggin’ crater. Not a big one, but a crater none the less. Bits of the electronic pod were scattered about and the crater was surrounded by a colorful cloud of International Orange paint flakes. To make it all the more fun, Patrick was recording the FPV video feed for these two attempts so it’s preserved for posterity and your amusement. At the end he’s holding up a very deformed aircraft and pointing the camera at me, indicating the crater.

What’s left after the crater crash. Yeah, it’s gonna be a looong sulking period for this one.
A closeup of the nose. That nose is just ever-so-slightly kinked, isn’t it? I should be kept away from this sort of stuff.
So that’s where this stands. The airframe is really messed up at this point so the sulk period before rebuilding will be much longer. I really don’t know why I’m having such issues. The balance is OK and all controls appear to operate properly. But something about its response just doesn’t feel right. I shall ponder it a bit.
Multicopters are SO much easier….
Postscript: Well, there’s this, which I knew was just a matter of time:
And…..We’re done with this one! I call this piece of performance art, “Carnage in Orange”. With enough vertical velocity one can crash in such an unambiguous manner that rebuilding no longer remains an option. Time for something new!