The “Pro Delrin Tricopter kit” from GetFPV.com was my first multirotor (and now that I think of it, WTF does “Pro” mean….as opposed to non-professional??). It was a very nice design but probably far too fragile for a dangerous, dumb-ass beginner like myself. I spent a lot of time repairing and rebuilding it. Part of the problem was I cheaped out and installed a KK2 flight controller. Now KK2 boards aren’t bad for what they are and what they cost (about $30 then) but they are limited in their ability to protect their craft from pilots such as myself. While they do a good job of keeping a multicopter level there is no altitude hold ability so I always found myself either shooting up or plummeting to the ground. Your mileage may vary.
As I moved up in the multicopter food chain to quadcopters I also moved into APM flight controllers. While there is a steep learning curve to them, once mastered they are phenomenal and can solidly hold an aircraft’s position both vertically and horizontally. Yeah, that’s for me. As a result, my tricopter with its stinky old KK2 board got stuffed into a corner of the garage and mostly ignored. Occasionally I’d come across it and wonder what it might be like if I could fit an APM on it. Would it be as cool as my quads?
Through a course of events I won’t bother to go into here, I eventually ended up with a supply of several clone APM boards from China which frankly left me with more than I needed. I began looking at the tricopter a bit more closely. I had a nice set of four motors, (FM4008 640KV) from my decommissioned Composite H-Quad capable of turning a wide variety of propellers, lots of ESCs, and most importantly, those wunnerful APM flight controllers. The game was afoot!
I tore down the original tricopter keeping only the main body and 10 mm Poplar arms. I spent considerable work making G-10 fiberglass motor mounts to match the original tricopter motor mounts but with hole spacings to accommodate the somewhat unusual pattern of the motors I was going to be using. Promptly upon finishing those I realized I could just slightly modify the wood arm ends and bolt the stinkin’ motors right to them. Cleaner and lighter. I eventually figure out the right thing, just not as fast as I’d like.
Tricopters are unique in the multicopter world as they actually require a mechanical servo to tilt the rear motor and prop to cause the craft to rotate. All other multirotor aircraft have some even number of motors and can speed up or slow down half the motors to induce turning. How to actually pull off this motor tilt on a tricopter is tricky, and while the original tricopter pivot design was elegant, it was fragile and subject to damage upon hard landing. As I was really, really good at those sort of landings, I modified the tail arm to use a motor tilt scheme put forth by RCExplorer. Very robust and simple. In other words, idiot-proof.
The other significant change I made was to enlarge the vibration isolated area. The APM operates best when well protected from vibration. So I combined its location with the battery holder which added mass to the suspended part of the system. This portion was suspended by the use of silicone bobbins, similar to what was done in the QAV design.
With a little effort I was able to get all the electronics stashed in a very small space. I had it in mind to try this as a simple camera platform, either for stills or video. It became, in essence, a flying camera. Not many bells and whistles beyond that.
Its 5.8 GHz video has a reach with normal antennas of about a mile, and much further with a better ground antenna. The tricopter’s onscreen display provides a visual readout of battery level, direction, altitude above launch and distance/direction back home. With a full camera load it hovers under 50% throttle and can maintain that for 13 minutes with a 3,300 mAh 4S battery. The thing is very light, coming in at 1,394 grams with a HD video camera, full FPV gear and a 3,300 mAh 4S battery.

A close up of the main body area of the tricopter showing important features. In this arrangement it’s carrying the Canon still camera.

Here is the tiny Mobius HD cam fitted on to the front of the tricopter. As it’s still being tested, in this image it’s merely zip tied onto a balsa wood block.
Performance with the APM flight controller is just damn amazing. My quads are fun, but the tricopter is like a sports car. Very maneuverable and can turn in an impossibly short space. Had I started with an APM in the tricopter I think my learning progress would have been a lot faster. Certainly I’d have less crash damage to repair. It also worked really well with the APM Autotune feature, self-tuning itself to really good values. There aren’t a lot of tricopters with APMs so this has been a good learning experience.
I did have some problems with a yaw wobble to work out. When hovering, the tricopter would slowly wiggle back and forth. Not an issue if taking still pictures, but lousy for video. After spending a lot of time trying to tune it out I realized it was due to the very flexible wood arms setting up some sort of resonance oscillation with the heavy motors and large props. By epoxying a thin skin of G-10 fiberglass sheet onto the surfaces of the rear arm, it stiffened it tremendously and almost all of the oscillation went away. I found that if I then increased the propeller size to larger props (which gives more load capacity and longer flight times) the oscillation returned. So if I’m doing still images and don’t care about oscillations I can use larger 12″ props, otherwise I stick to 11″ props. I think I’ve pushed this basic design as far as it can go with the present wood arms and I’m not really ready to invest the work necessary to go beyond it.
But the main reason I wanted to get this thing working was its transportability. It’s also why I wanted to keep the original body mostly intact. With the removal of only two screws the two front arms fold back and the entire tricopter transforms to a package that can easily be slipped into a backpack. Bring along the RC transmitter and FPV goggles and you have a minimalist setup for getting good images or video of remote backcountry locations.

The various components of the tricopter prior to assembly at a remote desert test area. This all fits nicely into a large backpack and transports very well.
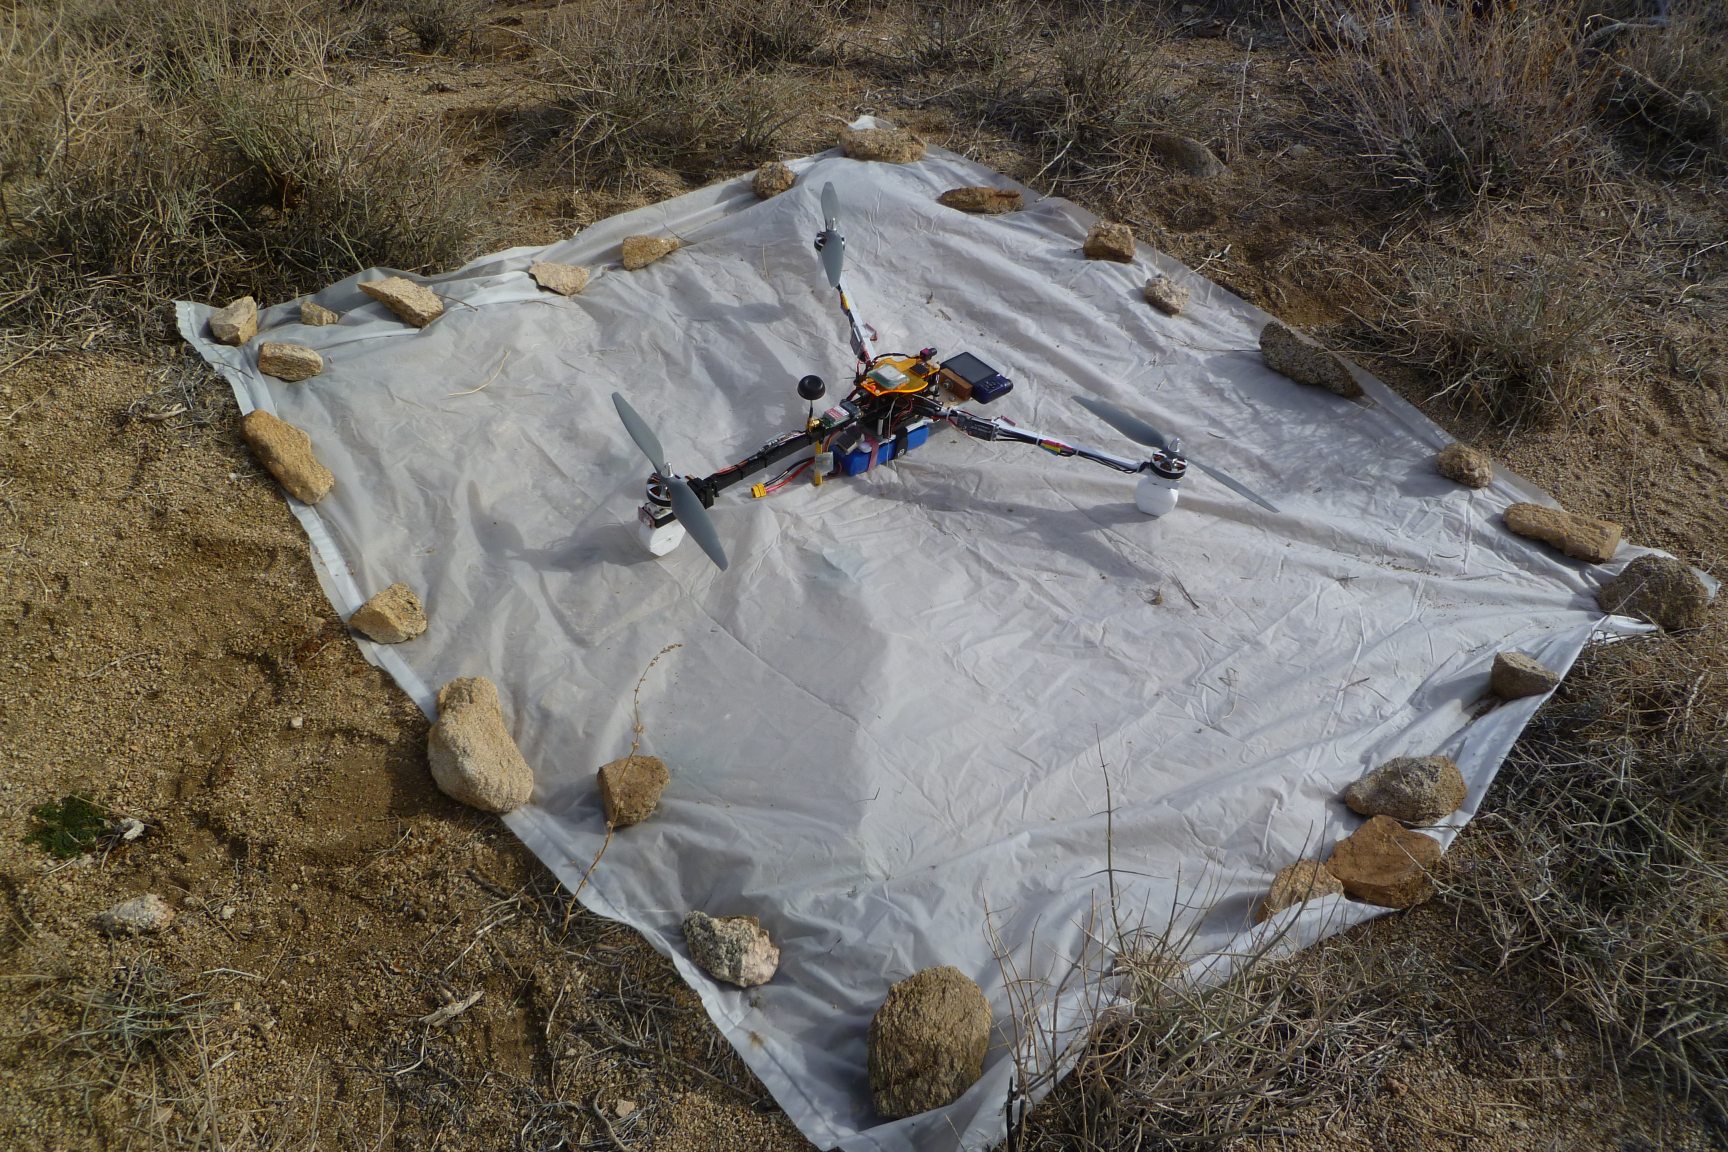
The assembled APM tricopter at a remote desert test area. The white plastic sheet keeps sand from being blown into the camera during takeoffs and landings.
It’s a nice tool to have…..