Aside from the general geekery of the gadgetry, my primary interests for fooling around with drones/UAVs have to do with mapping and aerial photography. I love aerial pics. This all combines in a especially interesting way for me using drones to image archaeological sites. So I figured it was time to try. As far as archaeological sites go, New Mexico is a target rich environment. The damn things are everywhere, so what better place to try a bit of imaging? So I selected two sites to experiment with on an extended visit Jeri and I made to New Mexico.
The first, unnamed site
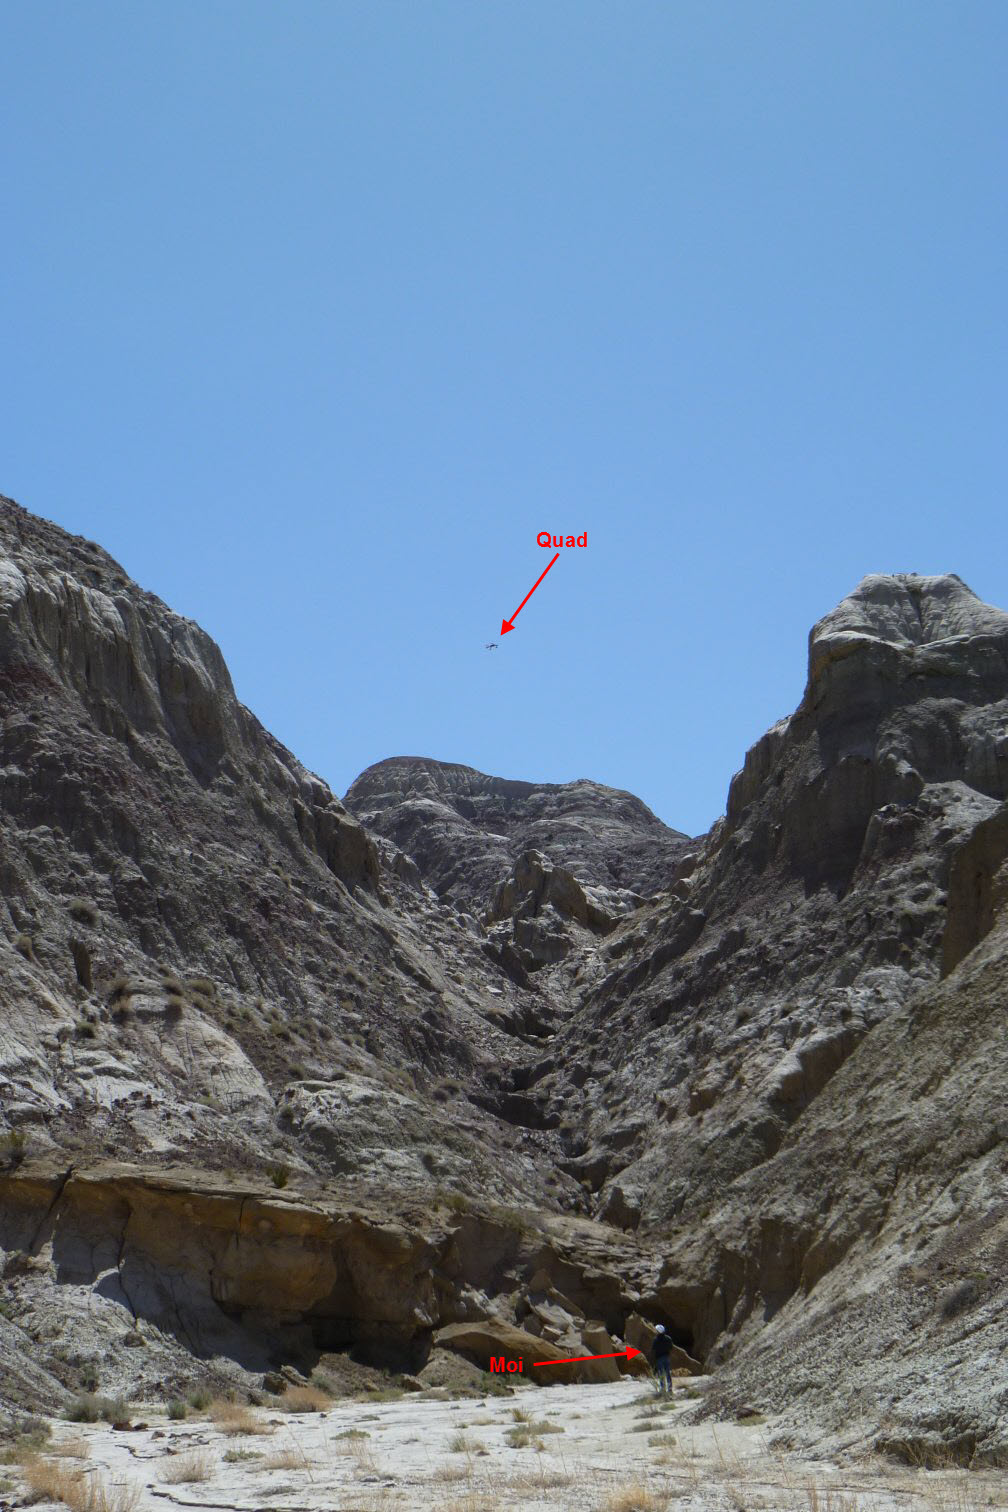
The first site is a very unusual and intriguing location I had visited a number of times previously. I’m not going to go into any detail on just what or where it is because of its unusual nature and its sensitivity. I will say it is on BLM land and has been studied very little, if at all. The area of interest is high on a rugged canyon wall (hence the appropriateness of a drone for imaging). I have noted some ceramic sherd scatter as well as lithic debitage at the location. Wood from the site has been radiocarbon dated to the period between 800 and 900 AD. The site sits above 6,000′, which would be an interesting challenge for my composite H-Quad quadcopter, which had only been tested at sea level.
Jeri and I visited the site on April 21 and 22, 2013. Both mornings had unfortunate high winds which greatly hampered flight operations (stinkin’ Spring in New Mexico!). The winds on the morning of the 21st were the better of the two days but I would normally consider both days too windy to fly. They were, however, the only windows of opportunity available to me. Jeri was assigned photographic duties to record any potential aircraft carnage of which I am prone to.
For the April 21st flights I was able to do two video flights and one still image flight. I took video with a Swann FreestyleHD sports camera (a FauxPro) and stills via a Canon A2200 14 megapixel camera running CHDK software. This software forced a shutter speed of 1,000 of a second and took an image every 5 seconds. Both cameras were positioned on a forward facing mount, angled down 15 degrees from horizontal. My area of interest on the steeply sloping terrain and weather conditions were not conducive to using a downward-looking camera mount for mapping purposes.
Because of the intimidating canyon wall confines I was not comfortable initially flying using my video goggles so instead flew line-of-sight on the morning of the 21st. Unfortunately this prevented me from flying as high as hoped since I needed to keep the quadcopter in sight and height estimation was difficult. In hindsight I realized didn’t really get high enough. The second video flight was somewhat higher but still fell short of where I wanted to be. Because of the turbulent conditions I had to keep considerable distance from the canyon walls so detail suffered. That, and the confines of the canyon walls themselves added to the difficulty.
The morning of April 22nd was even worse in terms of wind conditions but I chose to proceed. I’m stupid that way. The first flight was video and after being successful (or lucky) the previous day, I decided to risk flying it using video goggles. This ensured I could fly high enough to see all the way to the top of the canyon walls and gain the higher views the previous morning’s flights had lacked. When I did operate the quadcopter above the canyon rim it caught the full force of the northwesterly wind, headed like a bat outta hell to the southeast and required considerable angling of the copter to hold position against the wind. Thus a lot of the video ended up somewhat tilted as I have yet to add a self-leveling camera gimbal.
The second flight of that morning, the stills, was…entertaining. And not in a good way. Shortly after launch, while the quad was high along the canyon wall, the wind suddenly became so severe I momentarily lost control of the craft. I recall seeing flashes of sky in the goggles and at one point a rather small bush on the slope filled my view. This is not a good thing. As I could clearly hear the quad I ripped off my goggles and decided to bring it back down visually. This would have been a good course of action if I had known where to look, but the quad was hidden against the earth-tone background of the canyon wall. I could hear it, but couldn’t see it. This was especially not good.
At this point I’m figuring it’s not a matter of if I’m going to crash, it’s just when and the rest of the morning was going to be spent in a recovery effort. So as a last resort, gambling its orientation was somewhat level, I punched the throttle hard sending it screaming straight up from wherever the hell it was. After a few very long seconds it popped into view above the canyon rim and I had visual again. A few more sweaty minutes and I had it safely on the ground. Thus ended those flights.
The bright side to this episode (aside from the usual cheating of aircraft death) was that I got some acceptable video and some decent stills on the area I was interested in. Certainly good enough for a very first try. I also found my sea level quad flew just fine at this relatively high altitude.

Laying out the goodies and getting set up for launch. Note the FauxPro cam on the front of the quadcopter as this was a video flight.
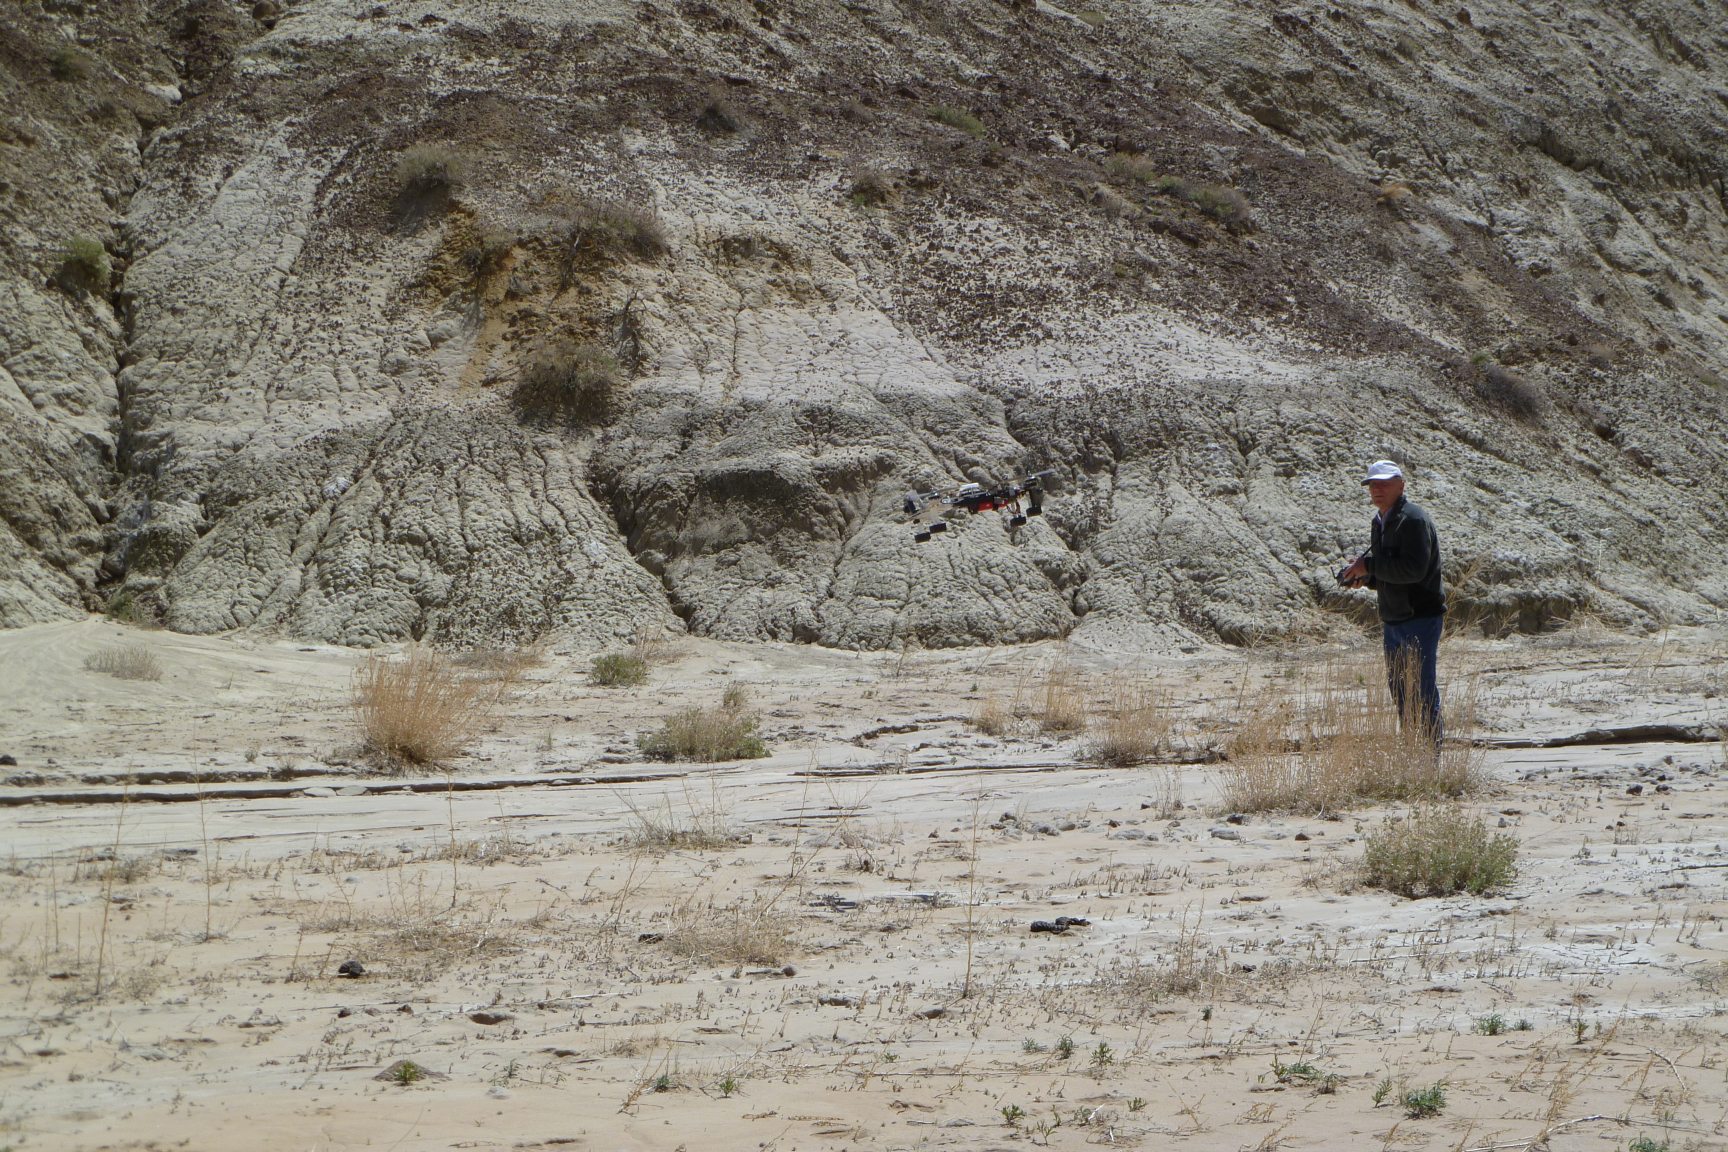
The quadcopter is up pretty high in this pic and starting to have issues with the wind. I’m flying it line-of-sight. When I switched to FPV goggles I would eventually get it up a lot higher.

Jeri got a pretty good telephoto shot of the quad examining the slopes.

In this image I’ve pulled off the goggles and am attempting to wrestle it to the ground in the wind, visually. I won….eventually.
Another “wrestle it to the ground” picture. With winds, takeoffs are easy. It’s landing that can ruin your day.
Pejunkwa ruins
The second, much less exciting, archaeological imaging test was at the Pejunkwa ruins in the Santa Fe National Forest, not too far from Jemez Springs the morning of April 30, 2013. I had previously visited the site and reported on it here. Since it was so easy to get to, and somewhat flat, I thought it would make a good test. Also it was at 7,500′ which could be even more of a challenge for the quad.
The winds that day were also uncooperative, but not crazy like at the first site. It was probably a smooth, constant 15 mph out of the northwest. I wanted to try doing some mapping style imaging so I put on the downward looking mount for the still camera. This puts the camera beneath the frame of the quad, with the extended lens just inches from the ground. From previous, bitter experience, I found that if I lifted off the quad or landed it on dirt, the rotors blew dirt into the extended camera lens and jammed the mechanism. . To avoid this I had taken to laying out a white plastic tarp for takeoffs and landings in dusty areas.
My initial plan was to fly sort of a grid pattern above the pines and try and cover as much of the open rubble piles as possible. I used my FPV goggles for this flight since it provides a heads up data display, overlaid on the image from the craft, and I could maintain the constant altitude I needed to get a good panoramic shot.
After liftoff I could clearly feel the wind’s effect on the craft. I ended up holding it at 300′ above the ground, much higher than I had originally planned (I often make this stuff up as I go along).
The wind was also causing problems with the quad’s orientation. I needed it to fly as level as possible to ensure the camera was pointed straight down. However if I wanted to fly into the wind I had to angle the craft quite a bit and the camera was no longer looking downward. After a couple of minutes of that I found the best approach was to fly fast and hard up into the wind, then let the wind drift it back downwind holding a fairly level orientation. This didn’t give me all the images I needed, but I got some that were useful.
Surprisingly, the quad operated pretty well at that altitude, although I noticed I had to use substantially more throttle. Unfortunately at the end of the first flight I landed stupid, nicked a prop and had failed to bring any spares along with me. So I only had the single flight at Pejunkwa.
Looking at the images was something of a disappointment. Lots of off-angle shots and the software I was using for image stitching, Microsoft Image Composite Editor (pretty decent and free) was just doing a crap job with my crap images.
Then I found AutoPano Giga from Kolor. Wow…It is the best image stitcher I have ever seen. It was able to take my junk pictures and turn them into a mediocre, but acceptable, composite image of the ruins area. It can take a series of images, at different rotations/orientations and combine them into a seamless mosaic…all friggin’ automatically. It’s magic I tell ya!
Here’s what I was finally able to produce from 31 individual images of Pejunkwa using Autopano Giga. I’ve shrunk it down to around 1.6 megs in size from the original 37 meg jpg. Some areas are darker as there were clouds moving across the sky and some images were taken while in the shade. Yeah, I know, it’s still pretty crap, but not as crap as it should be considering the individual source images. I prefer to think of it as a highly polished turd of a panorama.
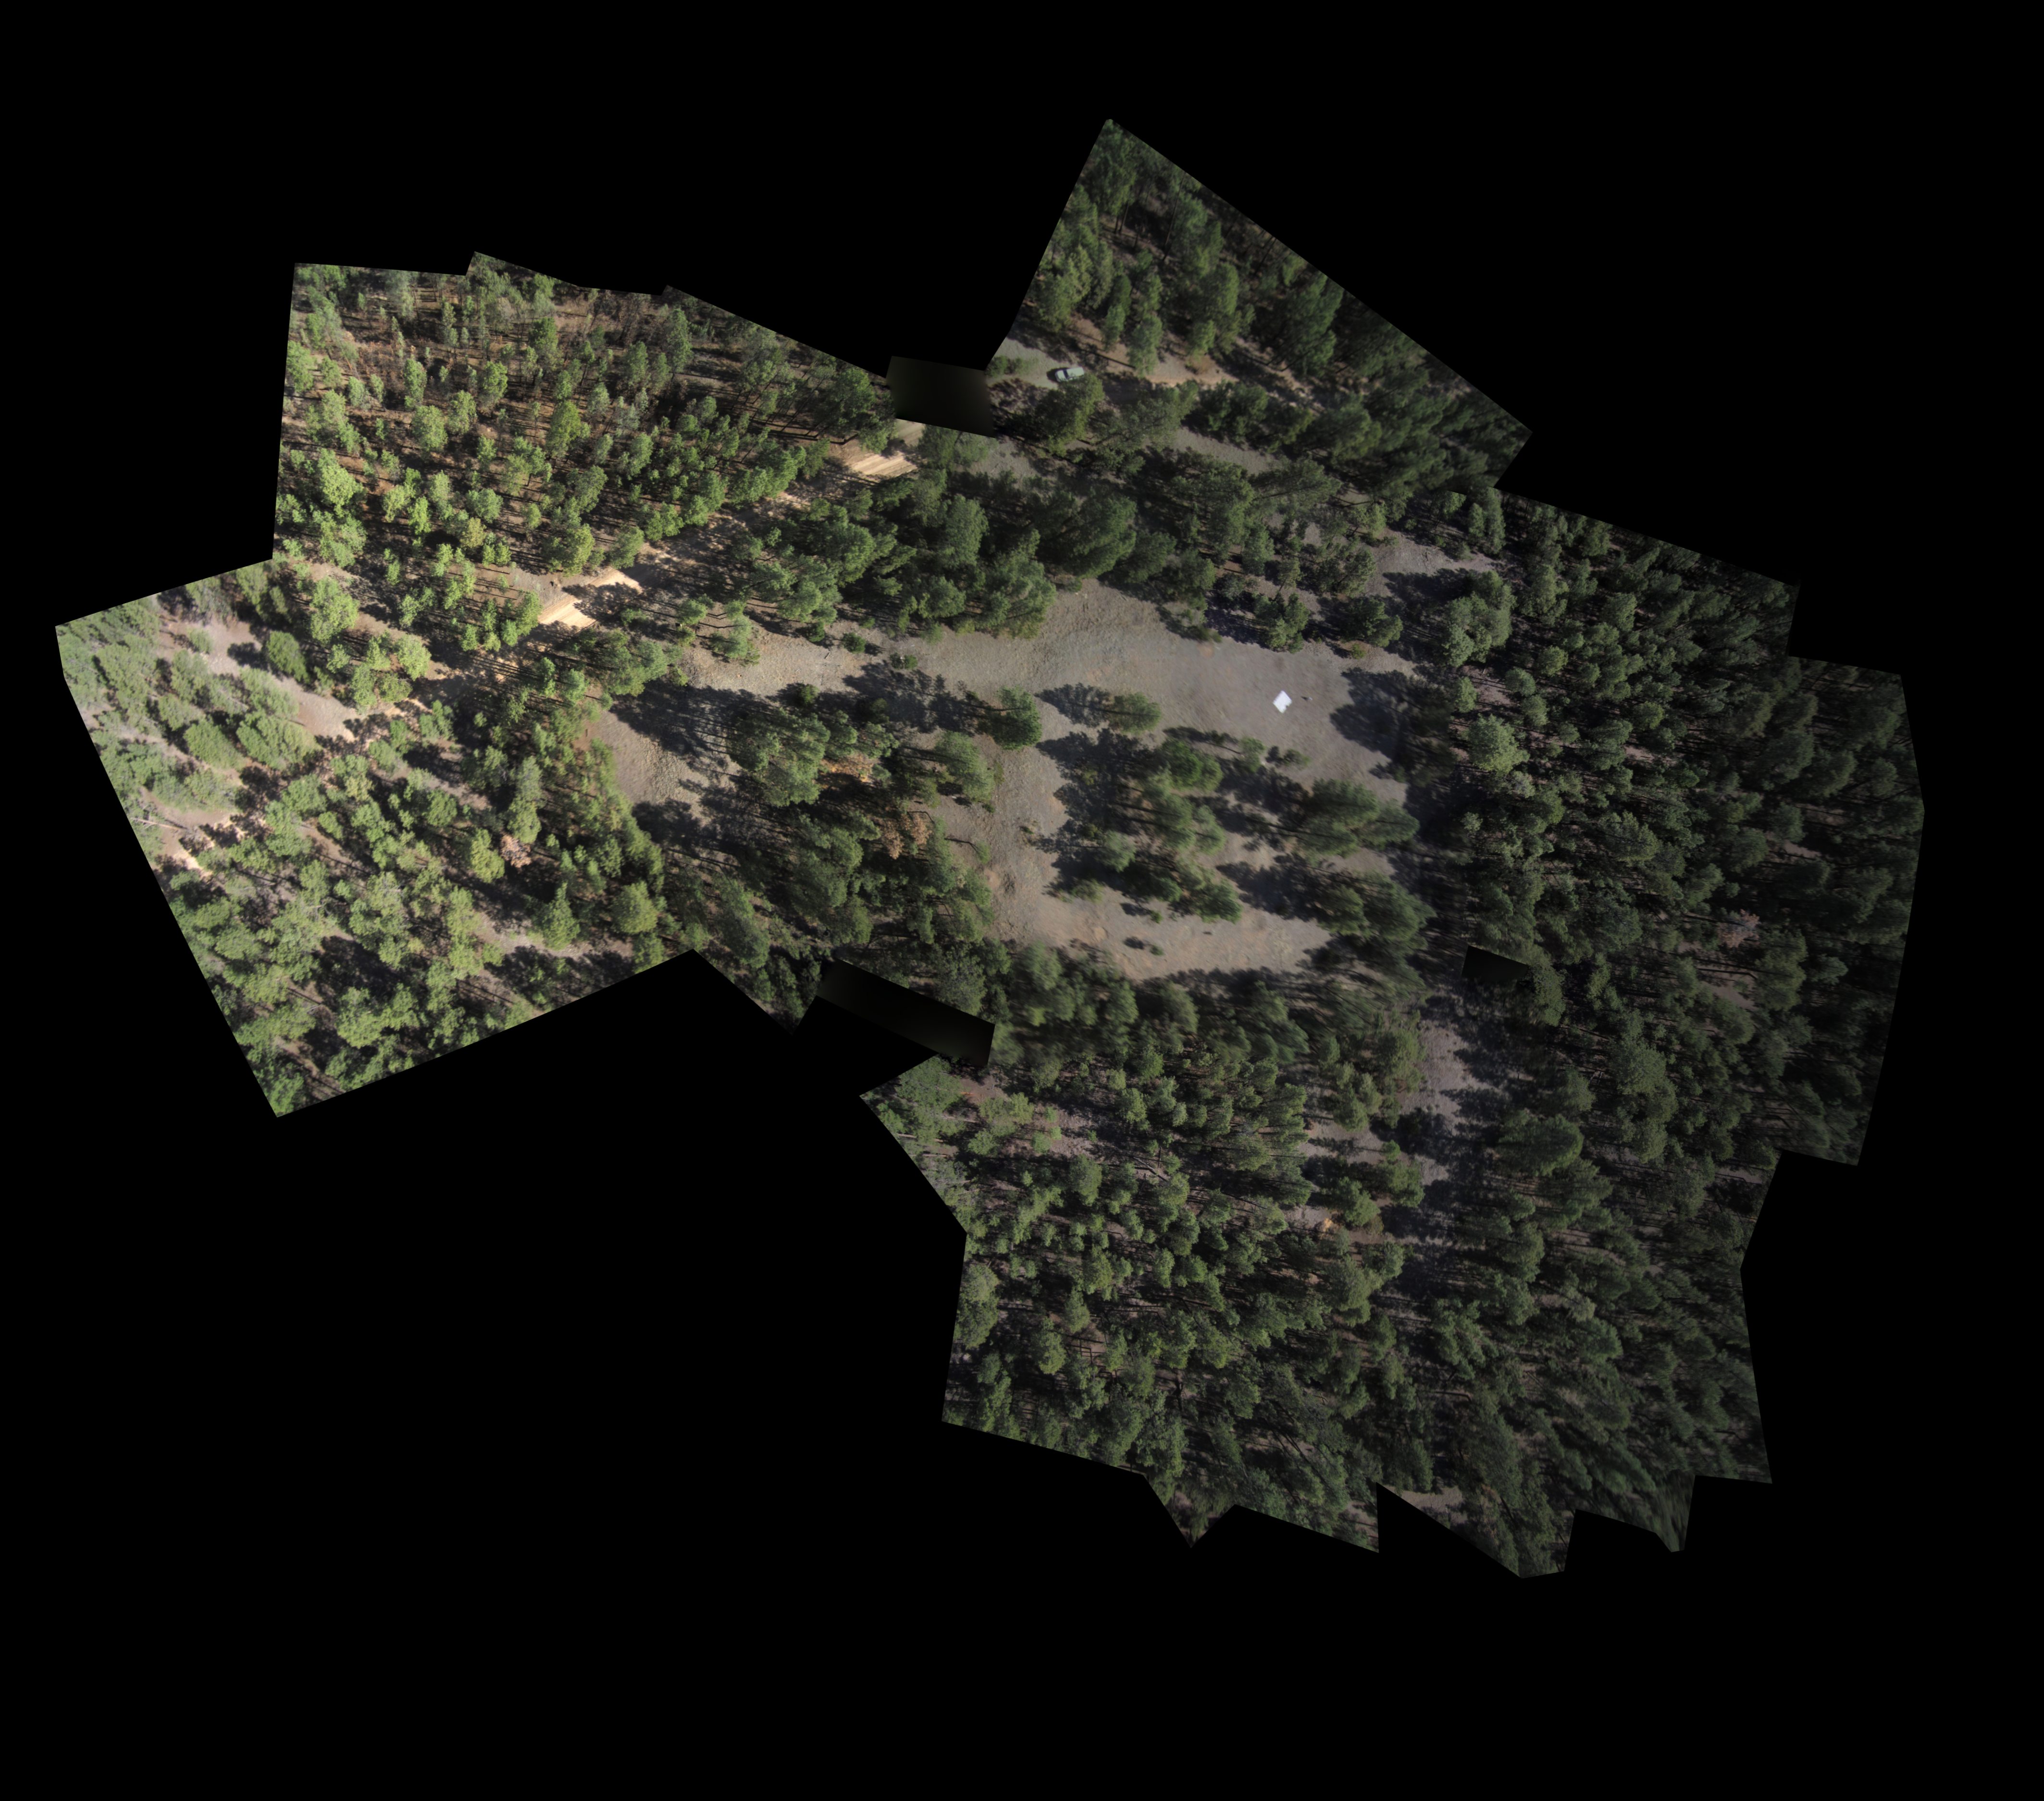
An aerial of the Pejunkwa site, with north being roughly up. The “launch tarp” is the white square at the upper right of the clearing. The clearing is actually the crumbled roomblocks.
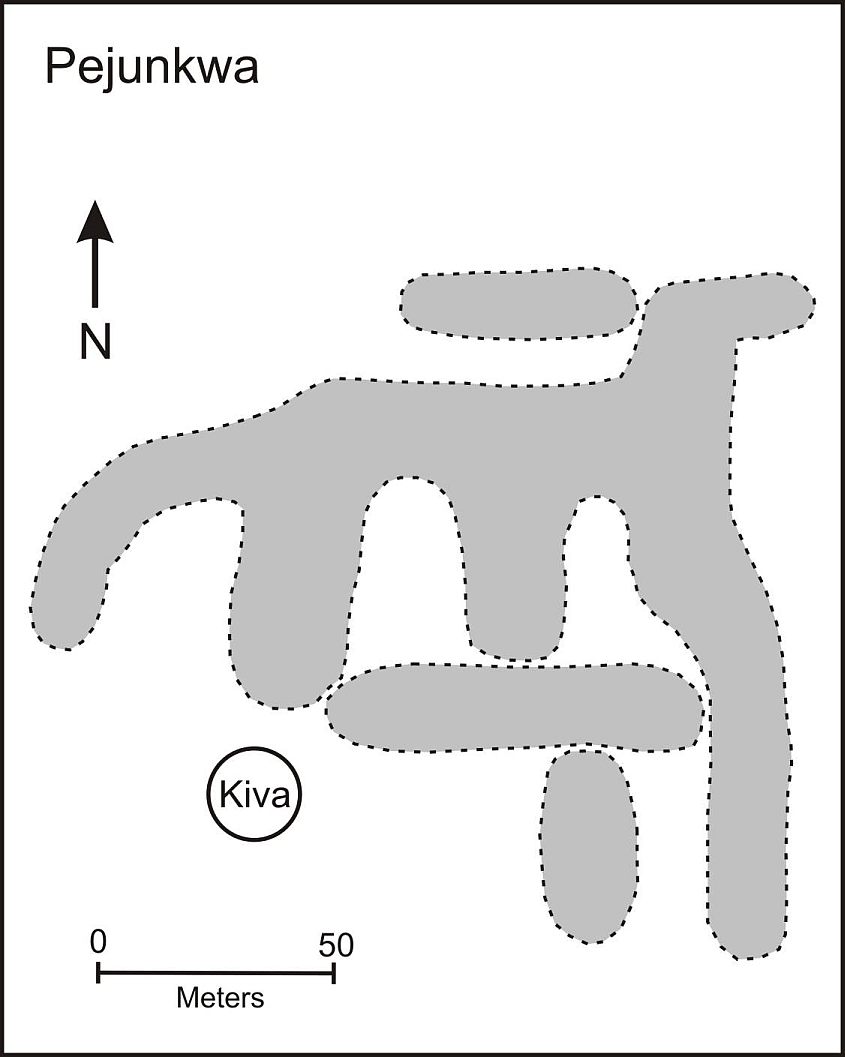
Pejunkwa Ruins (Adapted from “Overview and Synthesis of the Archeology of the Jemez Province”, New Mexico, by M. Elliot, 1986
Lessons learned
- Imaging flights need to be in fair wind conditions.
- Image intervals of 5 seconds are too far apart (I have since tweaked the setup to take images at a much better 3 second interval).
- A camera gimbal would be a very good thing to have.
- Always have spare props along.
I don’t know why they say there is a learning curve to all this. Curves are smooth. This is proving to be the learning jaggy-pointy-peaks of death.