
The Composite H-Quad
Having trashed my Tricopter to no end, I thought I might like to take a stab at building something of my own. I wanted it to be light, very strong (I beat the crap out of things), make it backpack transportable and also minimize vibration. I knew that dissimilar materials do a lot to kill vibration so I began to consider using a laminate of G-10 fiberglass sheet epoxied to a lightweight Poplar wood core. The G-10 provides huge tensile strength and the wood provides compressive strength. I wanted an H layout instead of an X Quad as I intended it for photography and with H-quads it’s a lot easier to keep the rotors out of the picture.
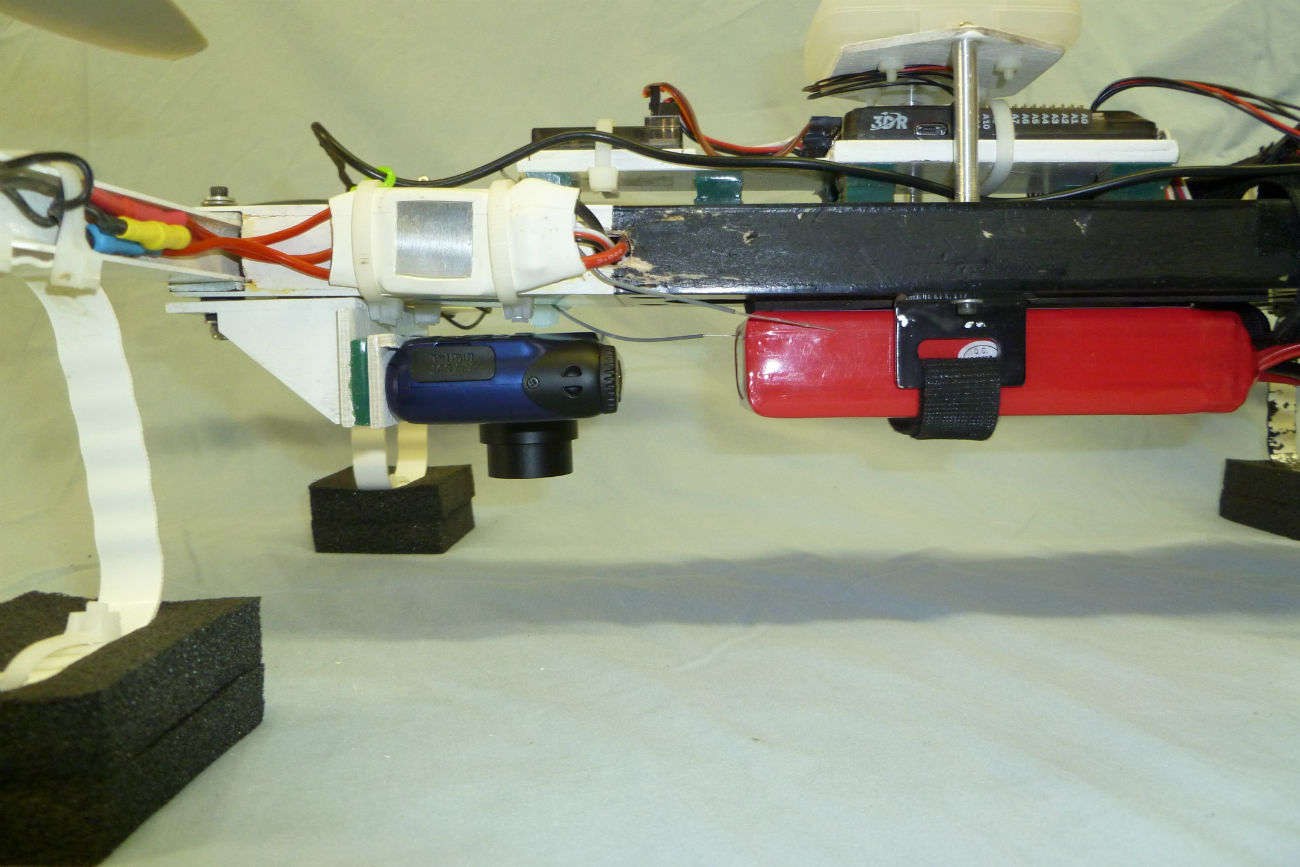
To further reduce vibration I sandwiched the motor arms with neoprene rubber where they attach to the body. But wait, there’s more! The attach screws themselves float with a combination of rubber washers and something called “Neobond” washers from a local real hardware store (not a big box). These things have a thick soft rubber washer bonded to a steel washer. The resultant setup has the arms firmly held to the body, all via rubber-to-rubber connections. I went one step further and floated the camera mount platform between two layers of a Sorbothane-like material called Kyoshoto Zeal. It has completely killed all Jello effects in the video.
Making it transportable was a challenge, and I was only partially successful. I began by making the arms removable with just a couple of screws holding them in place. I then set it up so the four ESCs are on the body and the three motor wires from each connect to the motors via bullet connectors which have color coded heat shrink on them. So I just match the colors and I know each motor will be turning in the right direction. What I didn’t take into account was the additional extension of the propeller blades, 5″ at each arm end. This makes for a somewhat long package to transport, made worse by the fact that each end, the props, are bendy. This has proven to be a pain.
Although the paint job may seem frivolous, I assure you it’s not. When the quad is flying some distance away and I’m not running FPV, it’s often times very hard to discern its orientation. You might think it’s pointed toward you, so you push the stick forward to bring it back, when in fact it’s pointed the other way and is flying merrily away from you. The white nose end provides a contrast which tremendously improves orientation recognition.
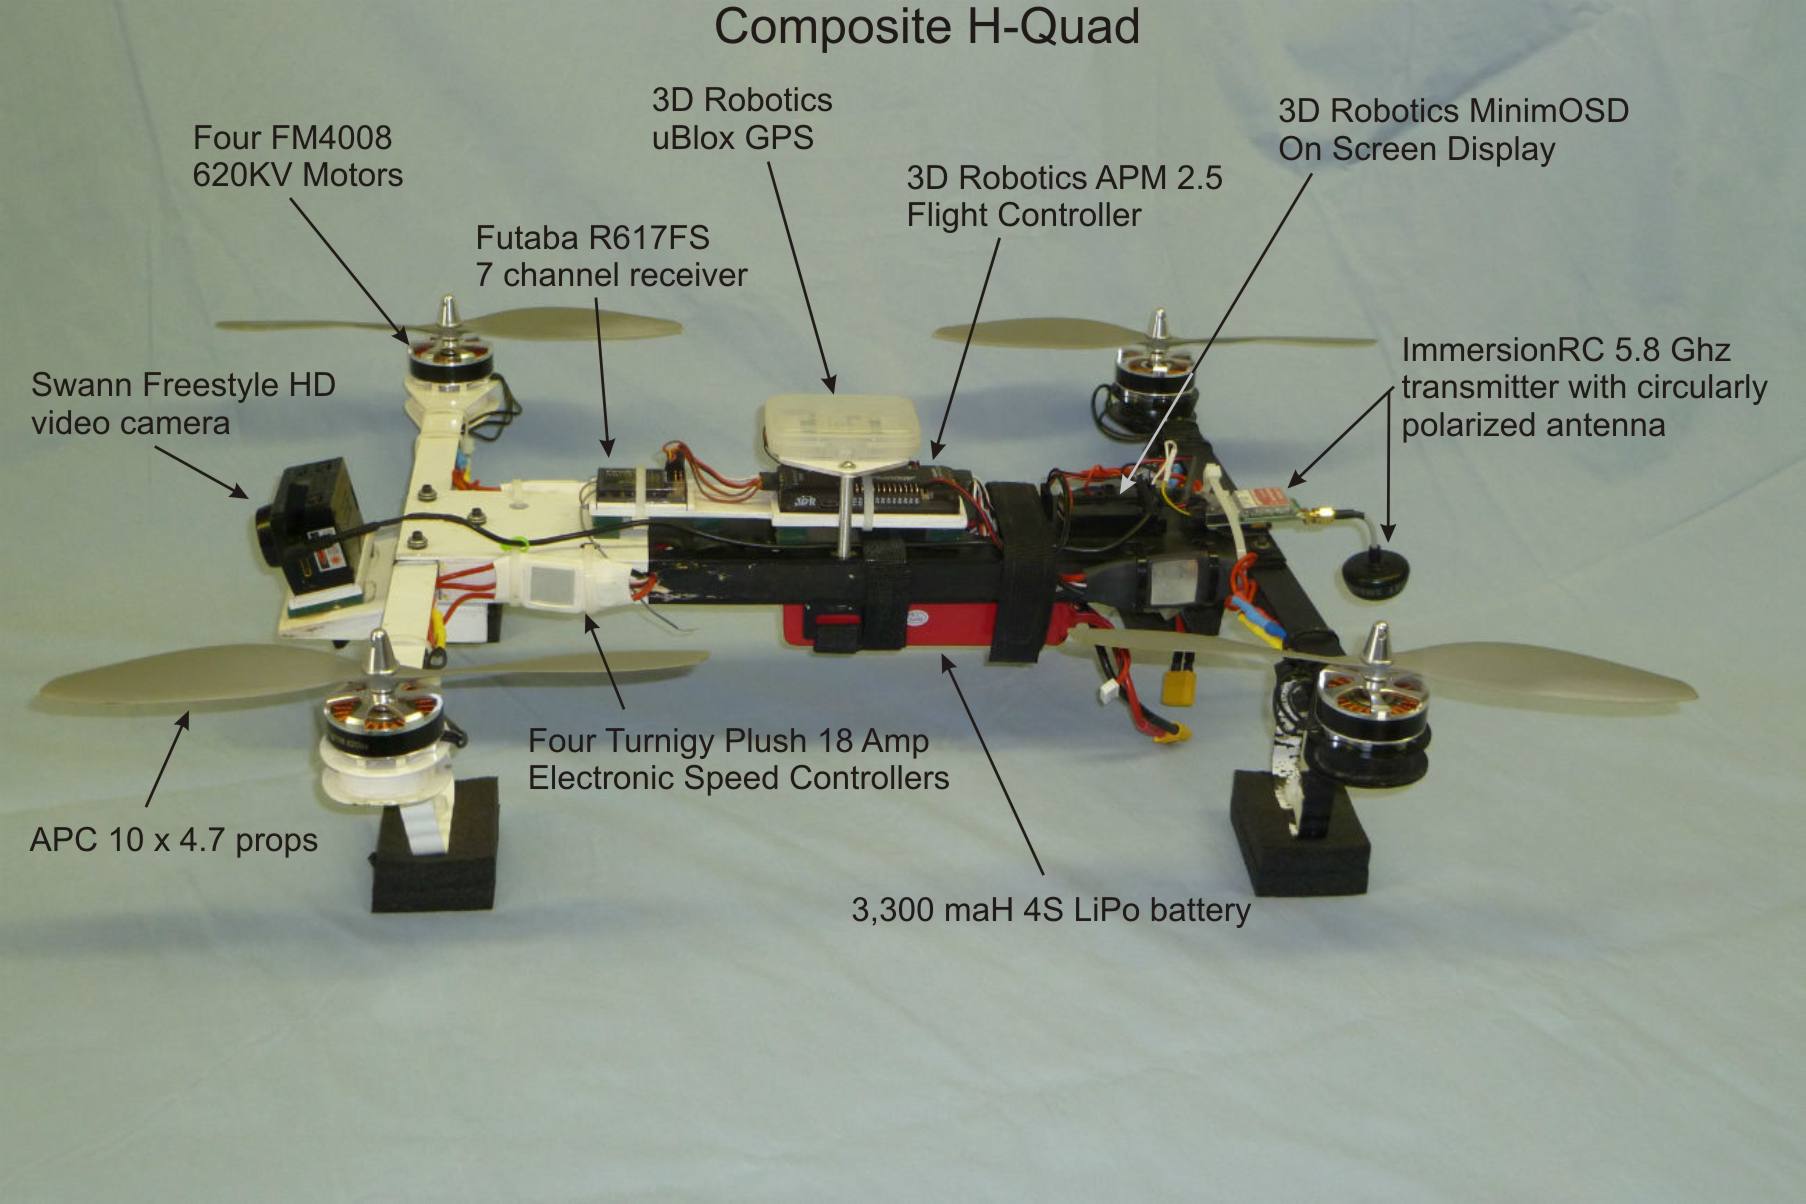
All the goodies in the current incarnation. This weighs in, without battery, at 1,454 grams.
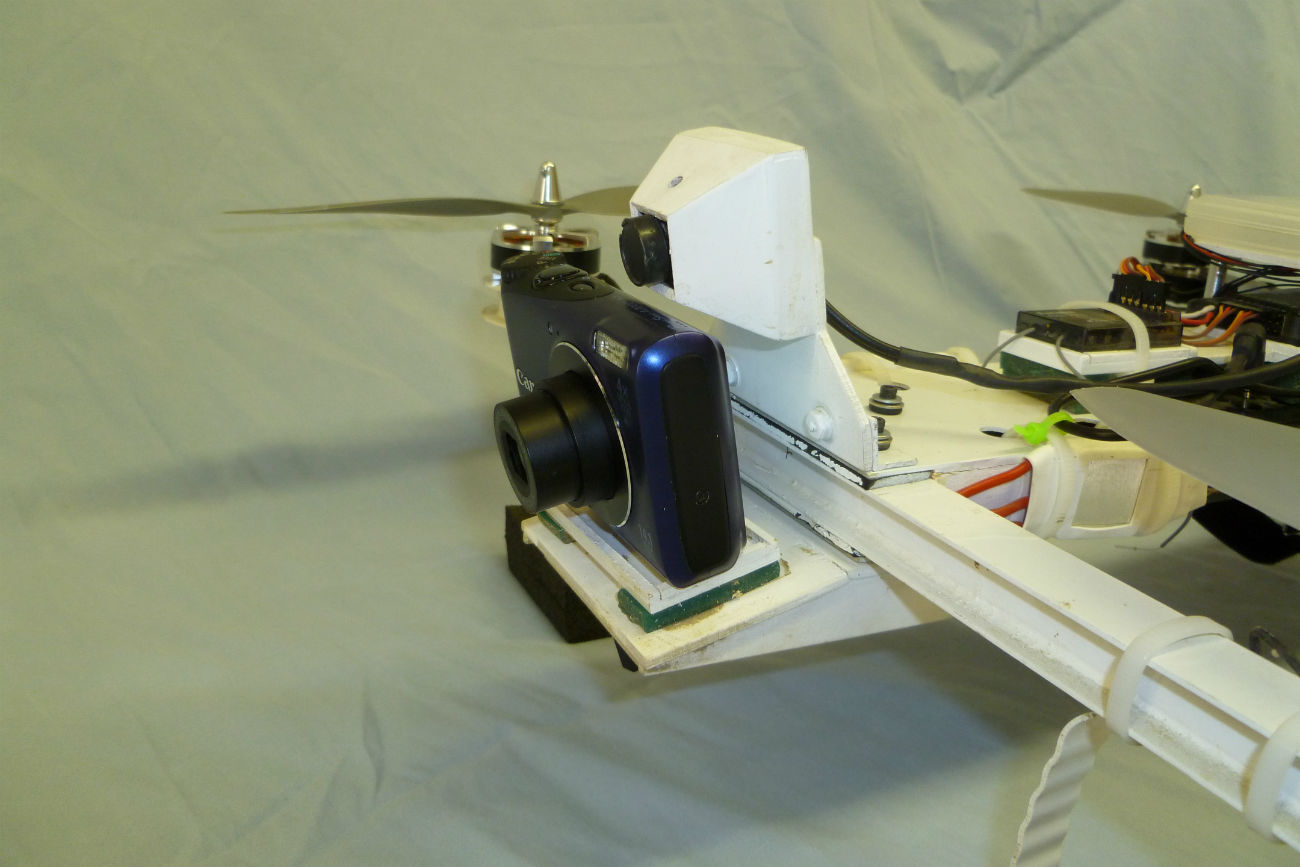
I floated the camera mount off the body by using rubber spacers. This meant the camera mount, constructed of 3/32″ modeling plywood, was a separate piece. After having to rebuild a first iteration of a mount that didn’t work well, it occurred to me I could make multiple mounts for different purposes and simply swap them. This allows me to quickly change between a forward looking mount (about a 15 degree downward slant), a 45 degree oblique view mount, and a pure vertical mount to look straight down. My still camera, a 14 megapixel Canon A2200 is running CHDK software which I’ve setup to shoot an image every 5 seconds at a shutter of 1/1000 second. This has provided excellent pictures. I actually find the forward looking mount does the best “scenic” shots, and I want to use the vertical mount for mapping or photogrammetry projects. I think the 45 degree mount might be useful when doing shots on hillsides or rapidly rising terrain.

Detail of Swann HD camera used for flight video. It also provides a mediocre video output which is fed to the transmitter for FPV use. Its 1080 recorded video is quite good though (and it was cheap!)

Detail of forward looking camera mount. Camera platform “floats” between two layers of green Kyosho Zeal vibration absorption sheet so there’s no hard connection to the body of the aircraft. Works great for killing Jello.
Canon A2200 with FPV camera (Sony 600TVL Super HAD) peering over its shoulder. This allows for a video feed while taking still shots. This configuration weighs 1,556 grams without battery. It seems heavy.

Canon A2200 on 45 degree mount for oblique aerial views.
Canon A2200 on vertical mount. Use of this requires caution as it’s just asking to damage the camera during a hard landing. Also it’s prone to dusting from the rotors. Note the use of the Zeal gel to the left of the camera to kill vibration.

Detail of the vertical camera mount and vibration isolation setup. The arms are insulated from the main body by neoprene strips top and bottom. The camera mount is further insulated from the body with Neobond washers. Oh yeah, the landing legs are sliced sections of PVC rain gutter downspout. Cheap and VERY springy!
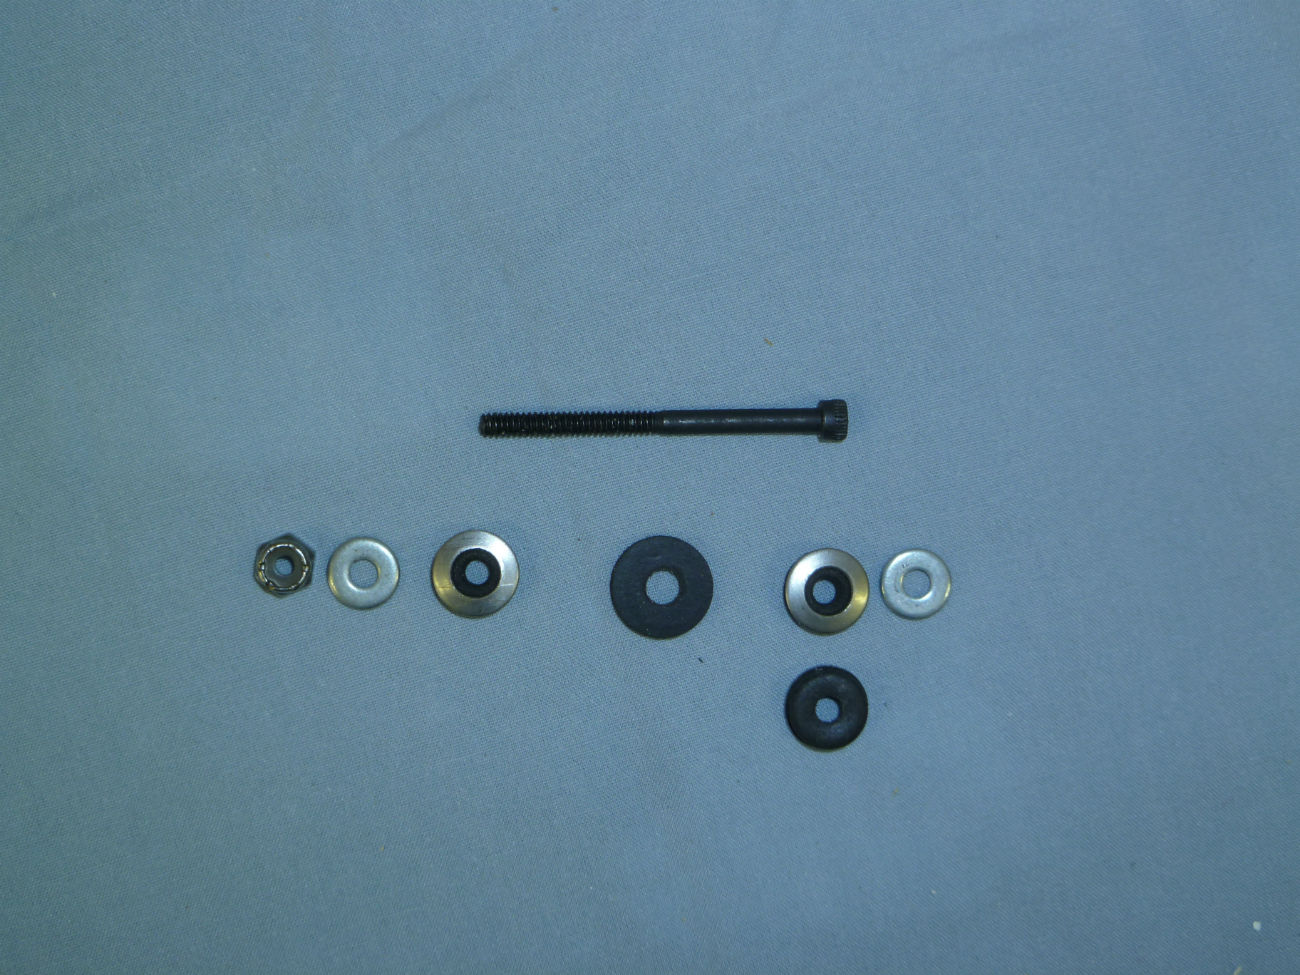
Vibration isolation stack for the camera mount using “Neobond” washers. They are rubber washers bonded to steel washers (I’ve flipped one over on the lower right). The center washer floats the camera mount away from the main body. There are no hard attach points to it.
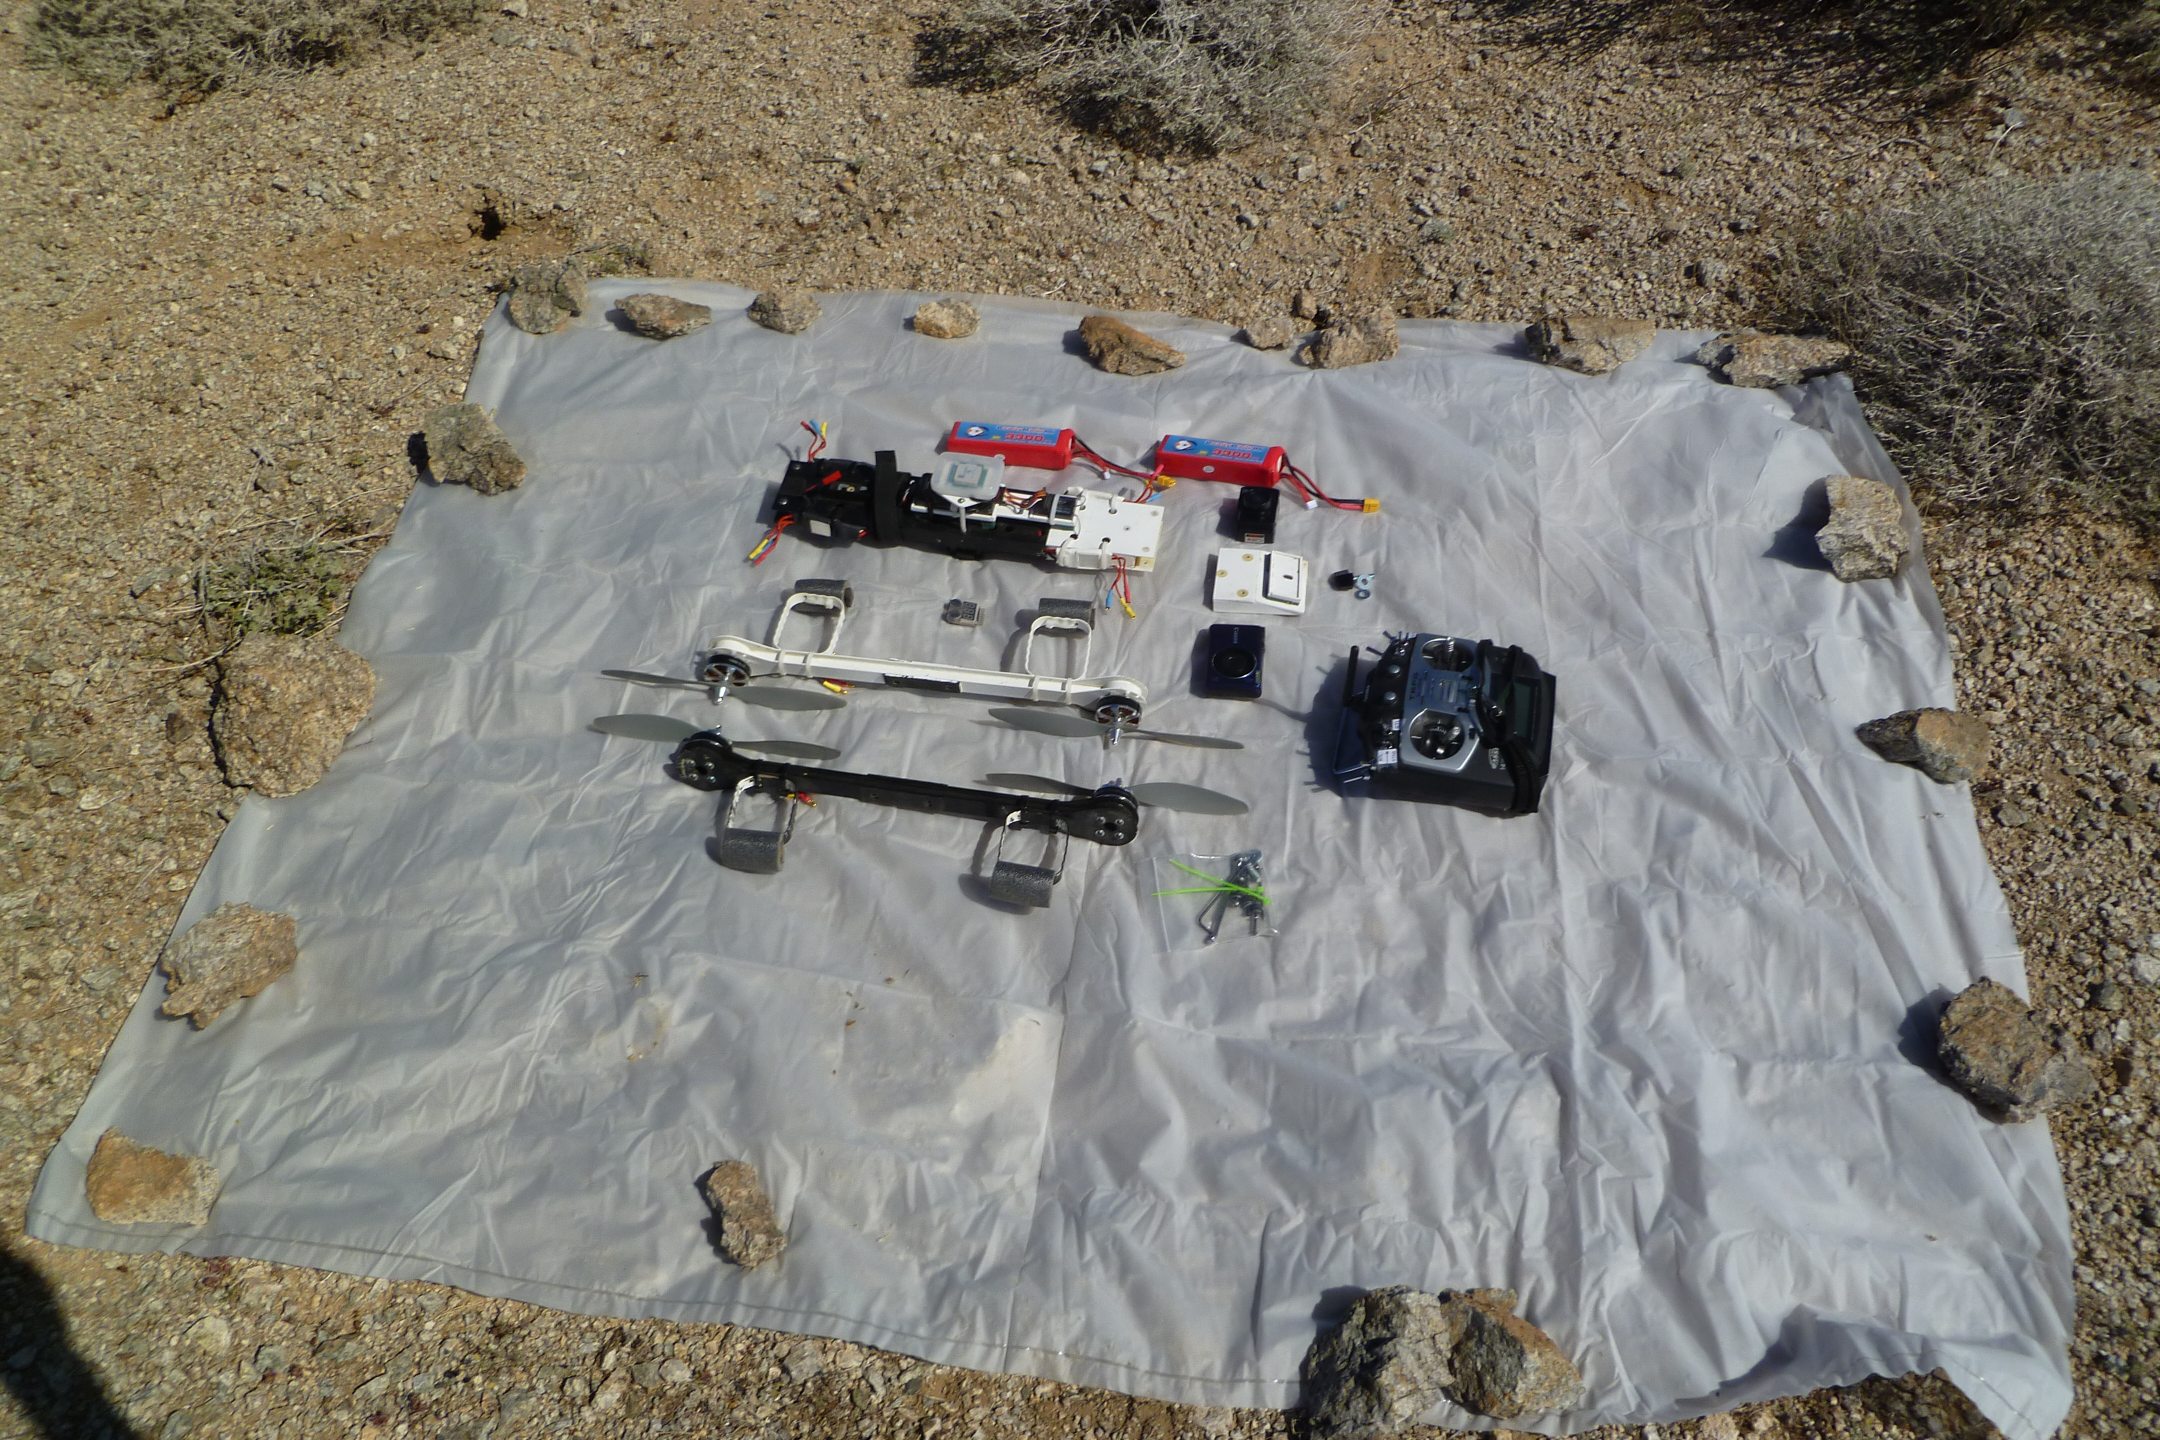
The disassembled Quad and accompanying equipment after packing it into a remote desert location. Tarp was to provide a dust free landing/takeoff area to protect the cameras. I failed to consider the propeller extension in my design and discovered they stick out in transport, leading to bent props. Lesson learned.
Construction notes
The following are some shots taken during the construction which show the inner workings.

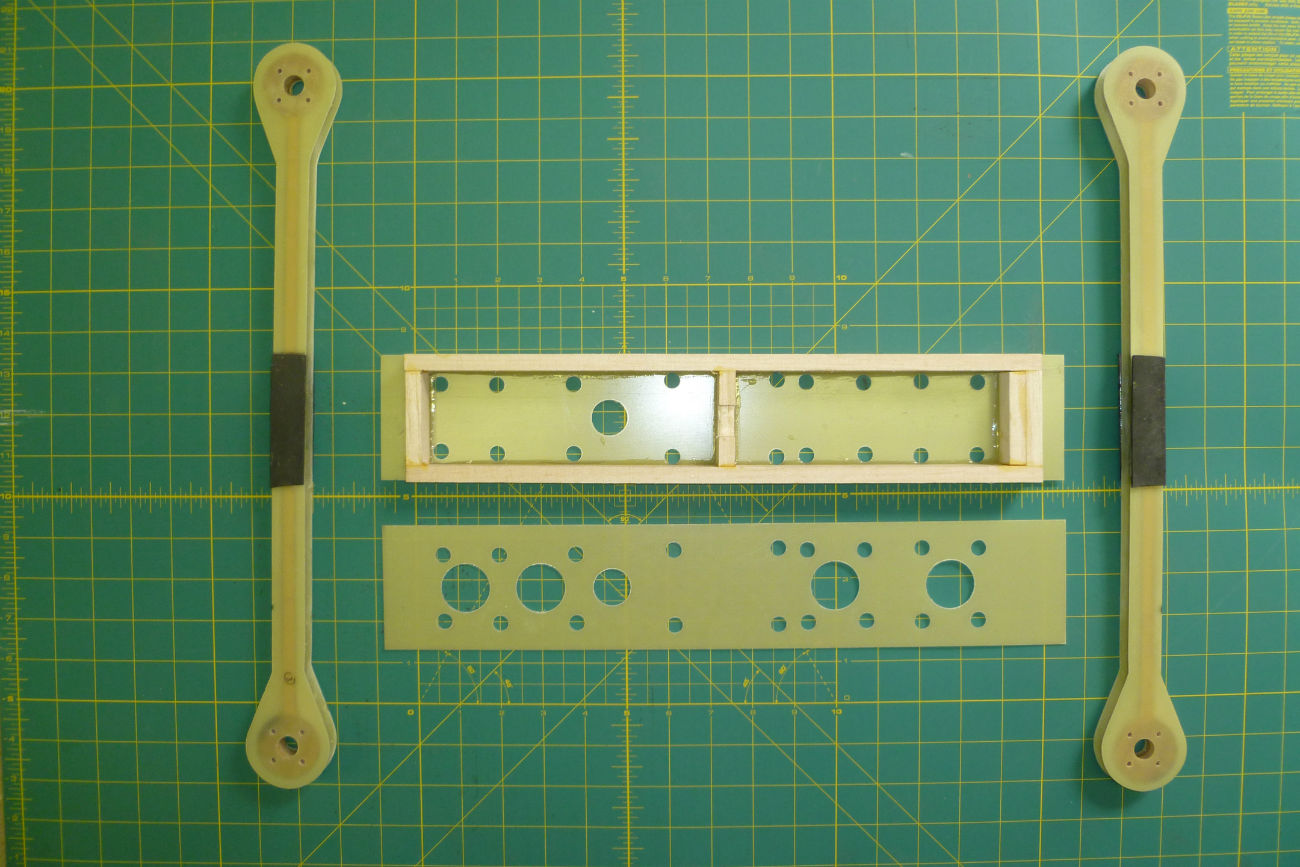
Arm components with G-10 fiberglass upper and lower plates and Poplar wood core. One of the assembled arms weighs 90 grams. The G-10 is 0.046″ thick.

Dimensional drawing of arm design. For those of you that know of such things, these dimensions result in a configuration roughly equivalent to a 560 mm class quadcopter.

Detail of arm end showing wood core. I extended the G-10 plates out to act as a protective skirt for the motors. When you crash as much as I do you think of these things. The wood is .500″ thick.

Body components during epoxy process. The bottom plate has the larger holes. I made the wood web here Balsa instead of Poplar and it has proven to be plenty strong. The interior depth is 0.800″ and allows for running the wiring.
The assembled arms and partially assembled body. The holes are for lightening and to allow wiring to pass through. The black strips on the arms are the neoprene spacer/isolaters.

An earlier version with a camera mount that didn’t work. Too much vibration resulting in Jello video. With the camera mass out on the “diving board”, it oscillated too easily. So I stiffened the mount, brought the camera inward and added Zeal vibration isolation gel.
All in all I’m pretty happy with the result. It flies well, for around 9 minutes and feels like it has a lot of power. The APM flight controller provides amazing abilities, some of which, like fully autonomous missions, are further up the learning curve from me. But I have benefited greatly from its GPS and the ability to simply throw a switch and have it come back to me from wherever it is, under its own control, and land. That’s just friggin’ amazing.
This design has been fantastically strong, due to the composite construction. During one crash incident I flew through a tree at 20′, then impacted a concrete V ditch. I figured it was toast, but the result was only a couple of broken props and minor scrapes to the arm ends. In a second crash (see a pattern) I managed to fly it into desert sand at high speed, sideways (the upside was I learned how windy is too windy). Again, replace a couple of props and it’s ready to go. Its robustness has greatly exceeded my expectations.
Things I found that worked:
- The composite vibration isolation concept.
- Floating components using rubber washers.
- Kyosho Zeal rocks!
- Color coding ESC wires for mindless connections.
- Multiple camera mounts.
- CHDK is REALLY useful.
Things that sorta suck:
- Doesn’t transport well enough. Maybe next version will have folding arms.
- Prop blast on dirt surfaces and delicate cameras don’t play well.
- I could have used thinner G-10 and perhaps Balsa instead of Poplar for the core.
- Need better wire management in the body. It’s a rat’s nest.