My resurrected tricopter was starting to edge into the “adequate” category. Not great, but adequate. It was somewhat transportable and it had a sophisticated APM flight controller, but…. (there are always buts). Fight time was a bit limited at 13 minutes. But that was carrying my fairly lightweight Canon A2200. If I wanted to carry my much heavier, GPS enabled Canon SX230 HS, well, that was a problem. I might as well strap a brick onto the sucker.
This problem resolved itself during a day of testing when the tricopter failed to pull out of a rapid descent and plowed into a brush covered hill. As much as I’d like to blame the aircraft, it’s always, somehow, pilot error. In any case, after 45 minutes of searching I turned up the following. While it doesn’t look too bad in the picture, the frame was essentially totaled.

The end of my resurrected tricopter. It was, as all good crashes are, spectacular.
I wasn’t too upset about the incident, as it now meant I got to build entirely new shit! And to that end I had already laid my grubby paws on a very cool tricopter airframe kit, called the Titan, by Fortis Airframes.
This was a great choice for a number of reasons. The most important was that I wanted to get away from all these damn custom things I had been building. Yeah, they were cool, but replacing a broken arm, if it was a built-up, composite design, could take a week. Sometimes it’s better to buy than build. And Fortis offered a good selection of inexpensive replacement parts. Check that box off big time!
Beyond having the ability to resupply my weekly airframe carnage-fests, Fortis’s design was damned good! The arms were designed to fold for transport, held in place by stretched O rings. These also will snap free in the (unlikely) event of a crash and absorb energy. It was fabricated out of Delrin plastic which is fairly flexible and forgiving. This was an airframe designed to be tossed around and abused, perfect for my sort of flying. The battery/camera holder was a wonderfully elegant and simple design, with it suspended and vibration isolated using four pieces of Tygon tubing. Many of the components were fastened together with zip ties so they would release at the zip tie rather than break something important.
Having spent more than a little time myself wrestling with the difficulties of multicopter design, I know good design when I see it, and this was very good. Finally, it’s a small, midwest company and made in the USA. I like to support those sort of outfits. It’s beyond me why Fortis doesn’t get more buzz for their product.
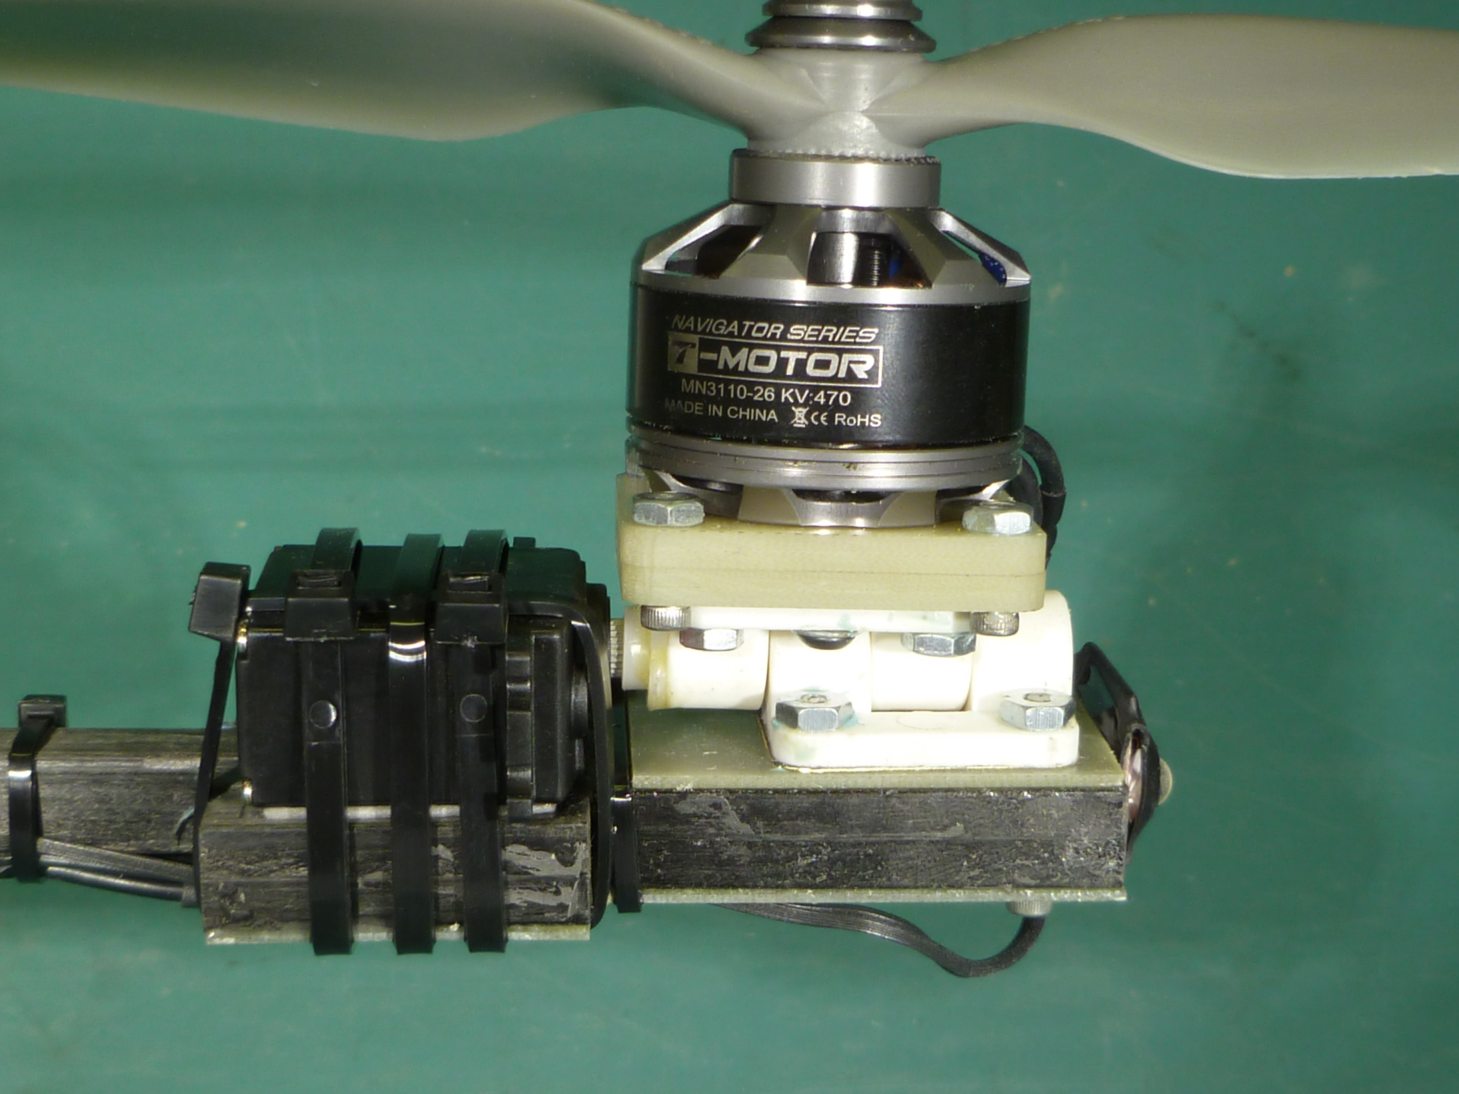
Fortis had some recommended motor/prop combos for their kit and the prop sizes ranged from 8″ up to 11″. Since I had a good idea of the weight I would be carrying, I played around with eCalc to see what the results would be with even larger props. I settled on some pretty beefy T-Motors MN3110-26 (470KV) turning either 14″ or 16″ props. With this configuration, eCalc was projecting 15 and 17 minute hover times, respectively. That would be great!
I also went with the carbon fiber arms, further reinforced with wood dowels glued in their centers. Another thing new for me was to try the new Castle Creations Multirotor ESCs. While they are somewhat more expensive than Chinese imports, they are amazingly small and light and the workmanship is first rate. So this was going to be an interesting build!
Moving a lot of the parts over from my crashed tricopter allowed me to get the Titan together very quickly. Because I was using somewhat large props with a relatively slow turning motor I decided to do a sync test before actually attempting a flight. This is because some ESCs can lose synchronization with the motors with the large prop/low KV combination, and well….just fall out of the sky. It would be similar to a car popping out of gear. And since Castle Creation ESCs were new to me I thought it wise. The easiest way to test for sync issues is simply tie the tricopter down and aggressively work the throttle up and down and see if the motor keeps up.
I decided to start testing with the “smaller” 14″ props, and if those worked I’d move up to 16″. A little knowledge is a dangerous thing. I tied the sucker down and opened up the throttle. Suddenly there was a commotion and bits when flying. I shut it down and had a look at what new horror I had perpetrated. To my surprise, the tail motor and prop had completely detached themselves from the rear arm. I didn’t see that one coming.

Note the dangley motor/prop affair on the right side, shortly after the first WTF? moment.
OK, probably my fault. The tail yaw mechanism is held in place by the nifty zip ties and perhaps I overtightened them with my zip tie gun, thus weakening them. I replaced the ties and carefully tightened them. Opened the throttle….and same thing. The tail motor and props decided to go walkabout. This was very odd.
I got in contact with Zach Cunningham, the owner/design of Fortis to see what he might know. He was extremely helpful, even though he hadn’t heard of this happening before. After several email exchanges I decided to replace the two 18 pound rated zip ties holding the yaw mechanism in place with two 40 pound zip ties. That’s some serious holding ability.
Ummmm….No. It lasted maybe three seconds then let loose again. Crap. More email exchanges with a very surprised Zach. Me, I’m less surprised as I’m used to having things I build go south on me. But it was annoying.
After several weeks of screwing around I came to some conclusions. I feel I was asking far too much of the design by installing large motors and props. The rear yaw mechanism is constructed out of Delrin, which is flexible, and is held together by slots and tabs. I think the large forces I was generating simply flexed the Delrin enough to pop the tabs out of place and total failure quickly ensued. This is a pattern I’m all too familiar with. The design is more than adequate for the range of prop sizes Fortis recommends for “normal” use. Normal bores me though.
So….Plan B. I had already constructed a yaw mechanism of my own for my dead tricopter. It’s a design called “RCExplorer” style, named after the guy who popularized it. It’s a VERY strong arrangement, based upon a heavy nylon hinge. Since I was beginning to realize I was deal with large forces, I also upgraded the tail servo to something heavier.
The massive RCExplorer-style yaw mechanism. In case of a nuclear holocaust, this and the cockroaches will survive.
To my pleasant surprise, testing showed this all stayed together, with no random bits heading off into different directions. It did have the unfortunate side effect of making the tricopter more tail heavy, thus requiring weight be moved further forward.
So, on to the first flight test. With the 14″ props I was running at 67% throttle at hover. That’s not really great, but the total weight for the flight was 1565 grams (heavy!) This included 152 stinkin’ grams I had to load on the nose to get the CG right. With my heavy Canon GPS camera on, it looked like I could get maybe 13 minutes of flight time with the 14″ props on a 4S 3300 mAh battery. But I wanted more.
So next step was to kick it up to 16″ props to see about longer flight times. Houston, we have a problem. Turned out the tricopter wouldn’t hold altitude. It moved up and down several meters. This is a classic result of too much vibration, where the accelerometers in the flight controller are fooled into thinking the aircraft is moving, when in fact it is not. Checking my APM flight controller logs indeed showed crazy levels of vibrations, vibrations that weren’t there with the 14″ props.
So began round one of vibration reduction. Anything that could wiggle was replaced. This included Fortis’s nice silicone pads under the front motors. I mounted the APM on double layers of Zeal vibration isolation material. And I increased the thickness of the rubber O rings holding the arms in place to reduce chances of their flexing. The result? Meh. Vibration down a bit, but still way beyond acceptable. Hovering in autonomous modes remained erratic.
Round two had me swapping out my purdy and nicely installed Castle Creations ESCs for more generic Chinese speed controllers. Why? Hell, I don’t know. I couldn’t see an obvious reason for the vibrations and I was finding the Castle ESCs to be a bit odd. I really didn’t have a lot of trust in them. So snip, snip, solder, solder. This was all turning into another custom build, something I had hoped to avoid.
Flight tests showed the vibrations were still there. This was becoming a resoundingly mediocre aircraft. My only option was to go back down to 14″ props which would allow me to fly my heavy camera for maybe 13 minutes. I really didn’t gain anything with the 16″ props as the vibrations caused such large swings in my flight controller’s throttle output that flight time wasn’t lengthened. And worse, it couldn’t be trusted to hold altitude. So I figured it was going to be 14″ props and 13 minutes. Still, it folded up nicely for transport.
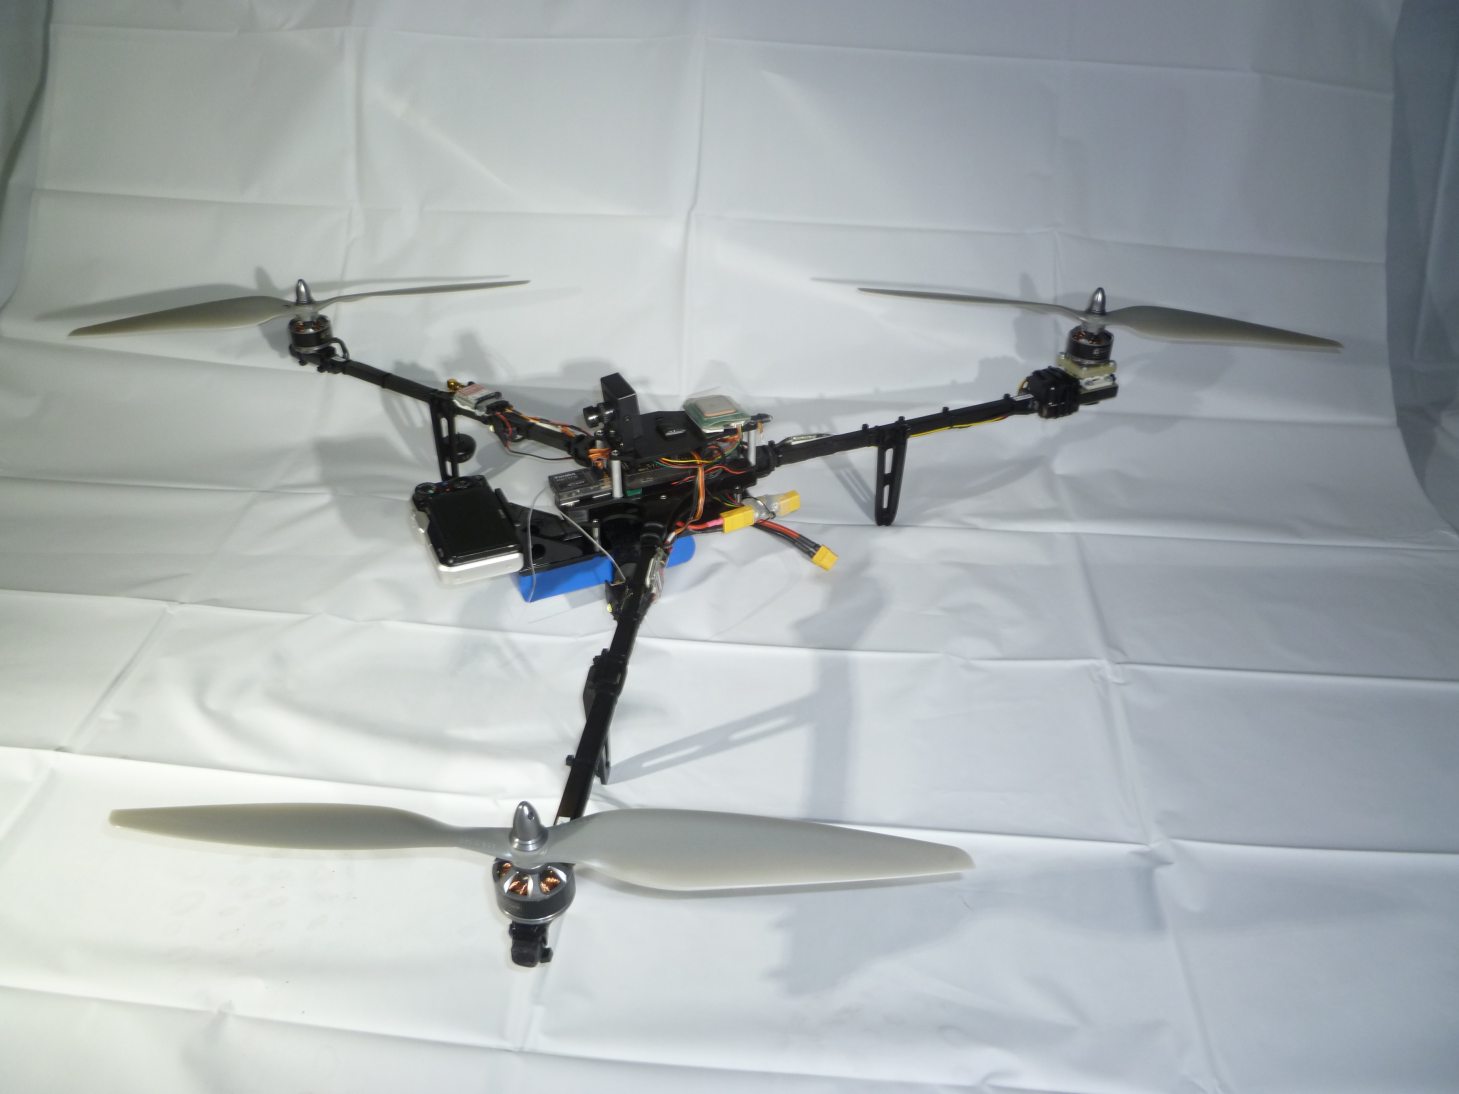
The slightly modified Titan tricopter with the heavy Canon SX230 on the front.

A closeup of the body, showing all the ‘lectronic goodness contained thereon. Note the nifty O ring shock release on the arm in the foreground.

The Titan tricopter folded up, ready for transport.

Proof it flies. Or maybe it’s just been Photoshopped in.

What it looks like taking the Titan tricopter to the field. All that’s needed is an RC transmitter , video goggles for FPV and a small DVR to record goggle video.
I used it a bit in the field but it was annoying the hell out of me. There was what I wanted it to do, and what it was actually doing. I had held to something of a lofty design goal that I’d like to be able to fly my heavy Canon SX230 GPS camera for a full 15 minutes. This was falling short, held back by the vibrations of larger props.
And I had also screwed things up a bit when I replaced the Castle ESCs on the arms. I managed to put the generic Chinese ESCs on the wrong side of the arms, so when they folded the ESCs got in the way and prevented full folding. In the interim I spent a couple of hours on the Internet learning the intricacies of the Castle ESCs and with that knowledge had become my ESCs of choice. And changing back the ESCs was going to be a messy task.
At this point there wasn’t much left of the original Titan tricopter other than the two front unmodified carbon fiber arms and the Delrin body. And in consideration of the vibrations, I was now beginning to eye the body suspiciously. It was, after all, designed to flex. So it became apparent that I could live with what I had….or do a complete rebuild.